You don’t need a full reno to make your home look wildly more stylish. A few strategic tweaks? Chef’s kiss. These easy DIY upgrades are quick wins with legit wow-factor—perfect for weekends, nap times, or when inspiration strikes at 10 p.m. (we’ve all been there).
1. Paint Just One Wall—But Make It Bold
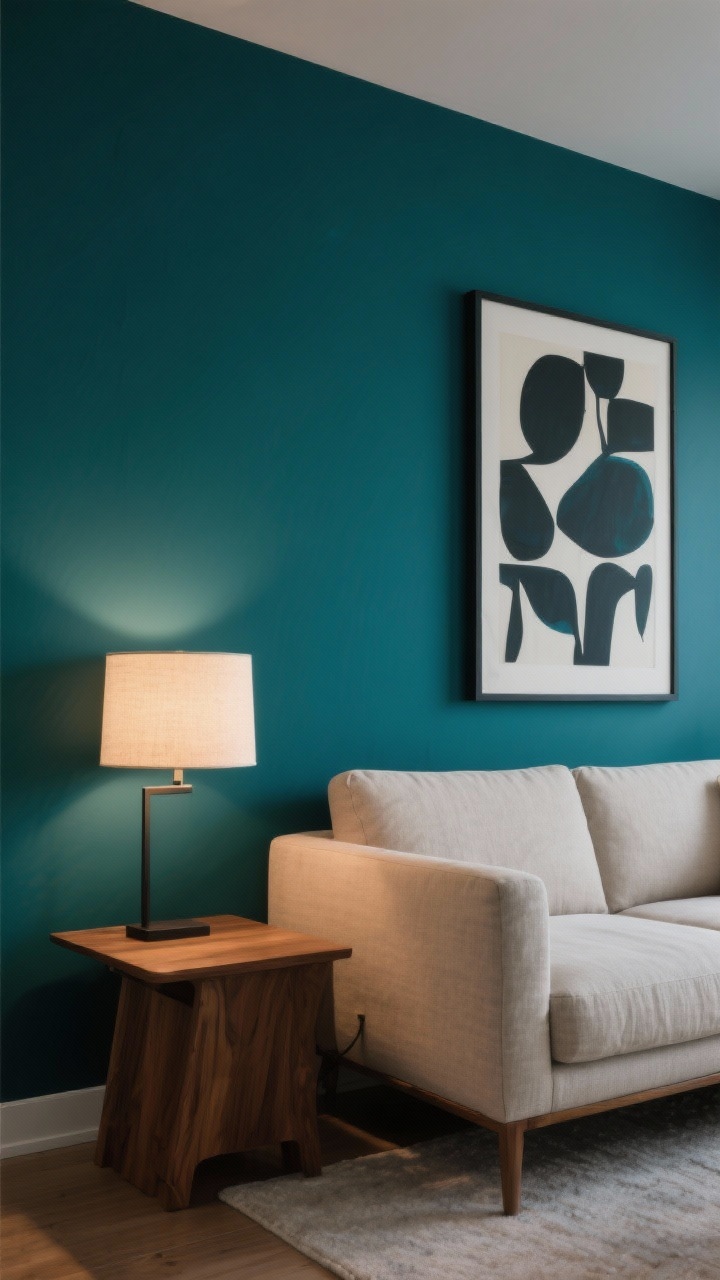
Think of an accent wall as a shortcut to drama. It zones a space, adds depth, and turns a “meh” room into a moment—without committing to four walls of color.
Color Ideas That Hit
- Deep teal or forest green behind a sofa or bed for instant coziness
- Clay or terracotta to warm up neutrals and wood tones
- Charcoal or navy for contrast that makes art pop
Pro tip: Use matte or eggshell for a chic, modern look. And tape off clean edges—crisp lines make it feel designer.
2. Swap Your Switch Plates (Yes, Really)
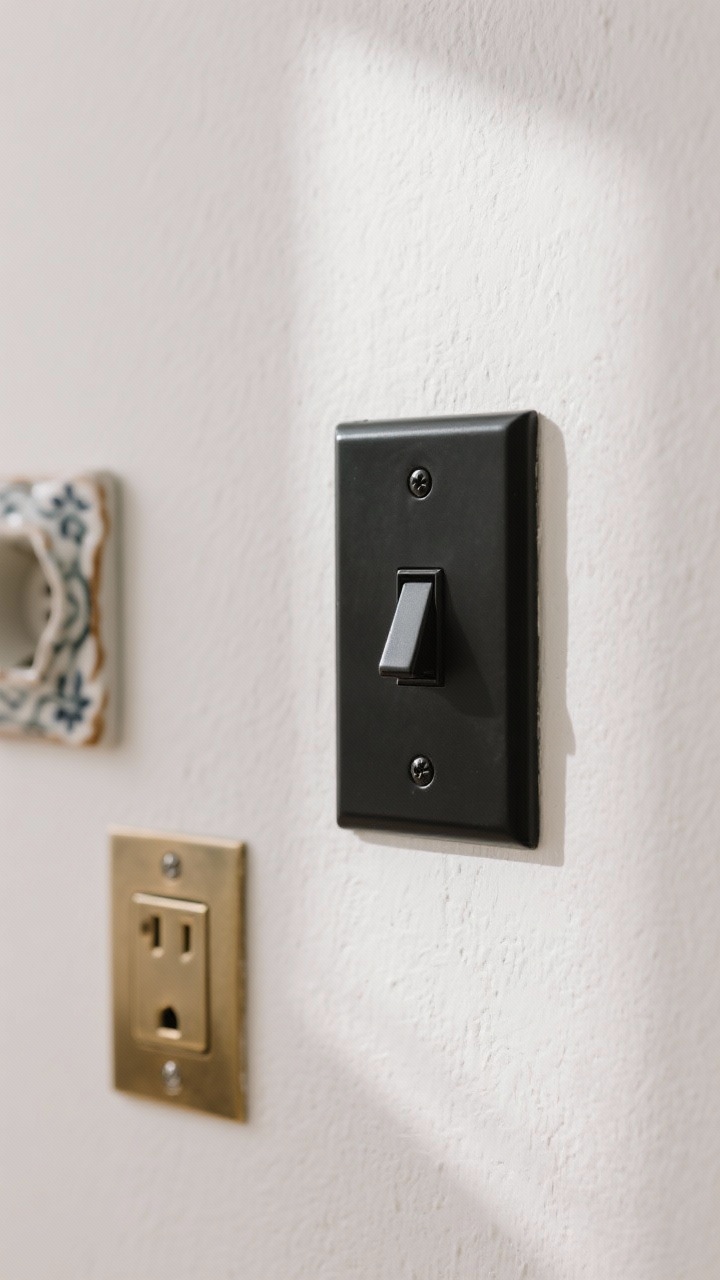
Light switches and outlets are the earrings of the room—small, shiny, and surprisingly transformative. Ditch the dingy plastic for something more intentional.
What to Choose
- Brushed brass or matte black plates for a modern upgrade
- Paintable plates to match your wall color (seamless vibe)
- Decorative covers in ceramic or wood for character
Turn off the power at the breaker (non-negotiable) and swap in under five minutes. FYI: Consistency across a room makes it feel finished.
3. Layer Lighting Like a Magazine Spread
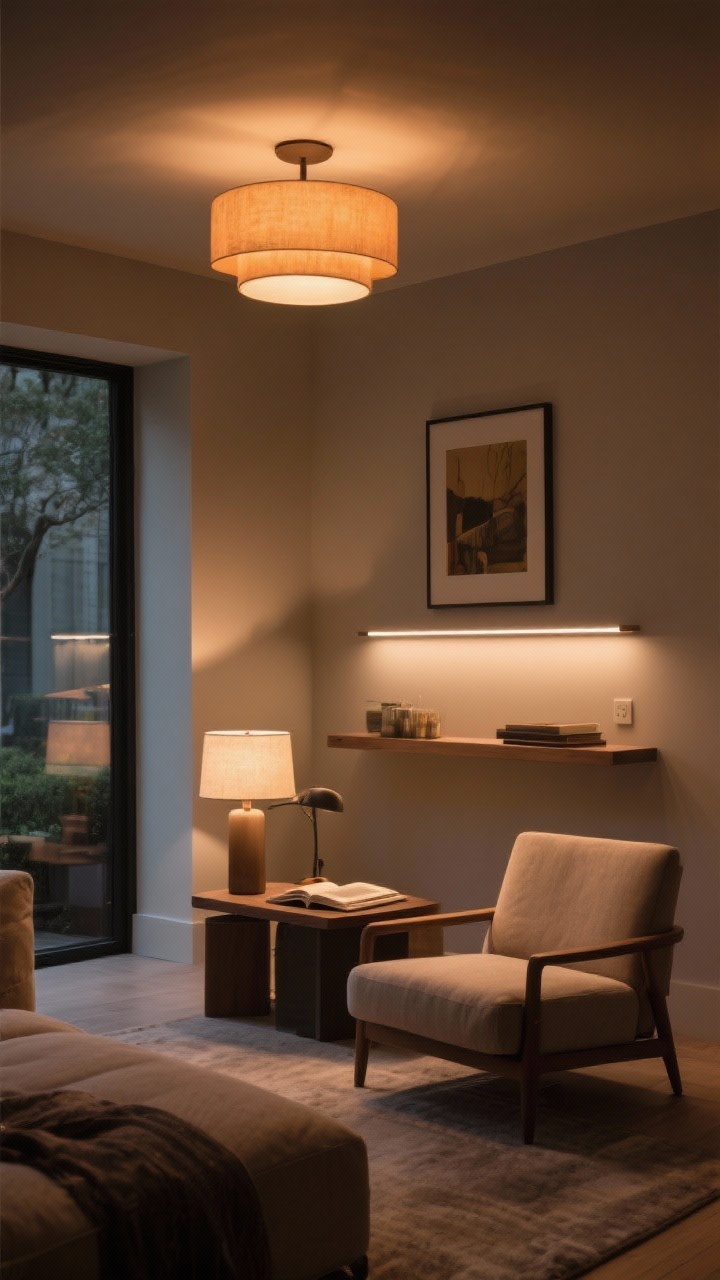
Overhead lighting alone = interrogation room. Layering lights adds warmth and makes everything (and everyone) look better.
The Three Layers
- Ambient: Floor lamps, ceiling fixtures (set the base mood)
- Task: Desk lamps, under-cabinet lights (where you actually do stuff)
- Accent: Picture lights, candles, LED strips (the “ooooh” factor)
Dimmer switches are game-changers. Install a plug-in sconce if wiring feels scary—no electrician required, all the style points.
4. Add Architectural Lines With Easy Trim
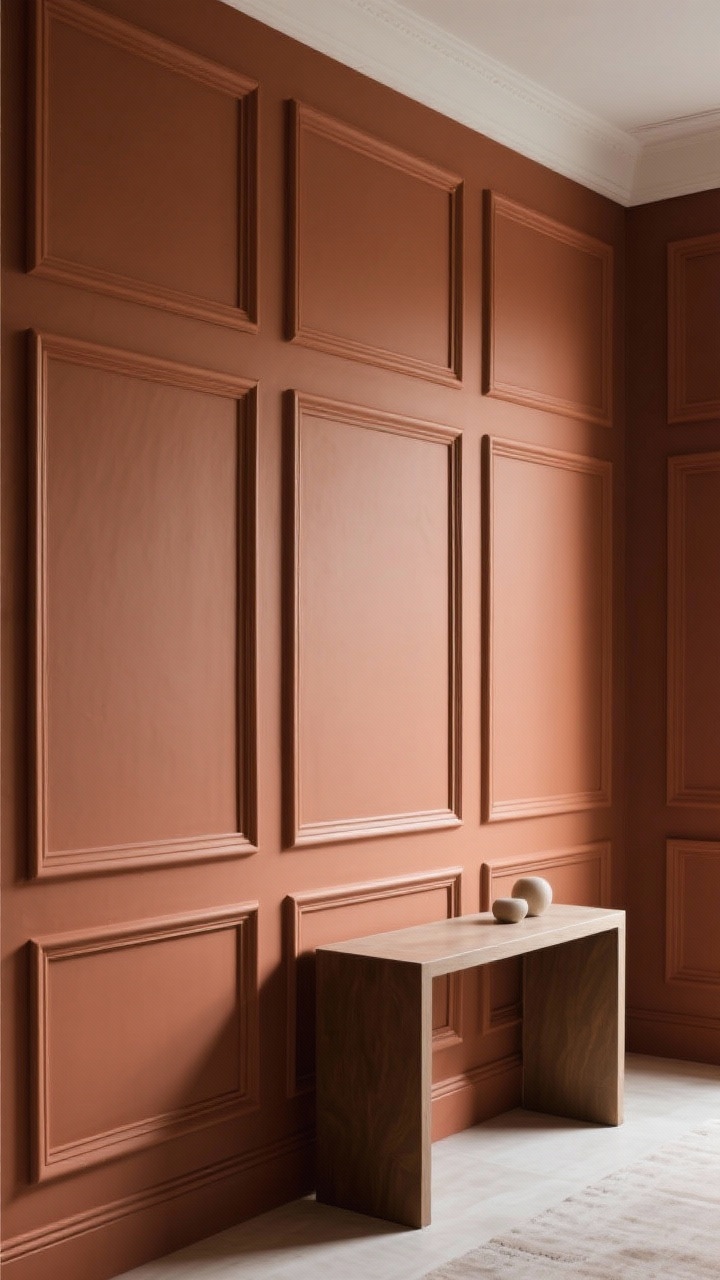
Want instant “custom home” energy? Add peel-and-stick molding or simple wood trim to create box molding or a picture rail. It frames your walls like art.
How to Get the Look
- Map out rectangles with painter’s tape first
- Use lightweight molding or foam trim; cut with a miter box
- Paint walls and trim the same color for a luxe, cohesive feel
This is one of those small DIY changes with big impact that makes your space look…expensive. IMO, it’s the fastest way to “architectural upgrade” on a budget.
5. Upgrade Hardware—The Jewelry Trick
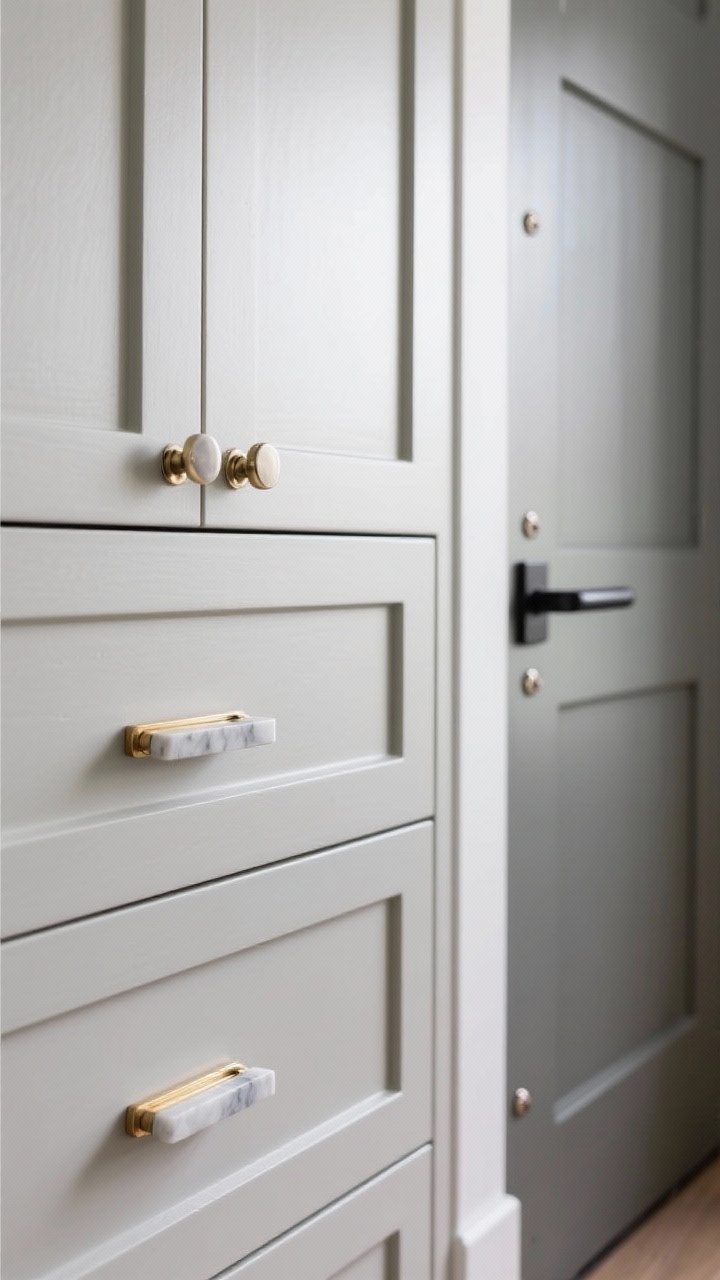
New cabinet pulls, knobs, and even door handles can transform a kitchen, bath, or dresser in under an hour. Like swapping sneakers for heels.
Pick a Vibe
- Brass + marble for glam meets timeless
- Matte black for sleek modern
- Leather pulls for warm, Scandinavian charm
Measure screw spacing before ordering (center-to-center). Keep the old hardware in a labeled bag in case you ever want to swap back or resell.
6. Create a Curated Shelf Story
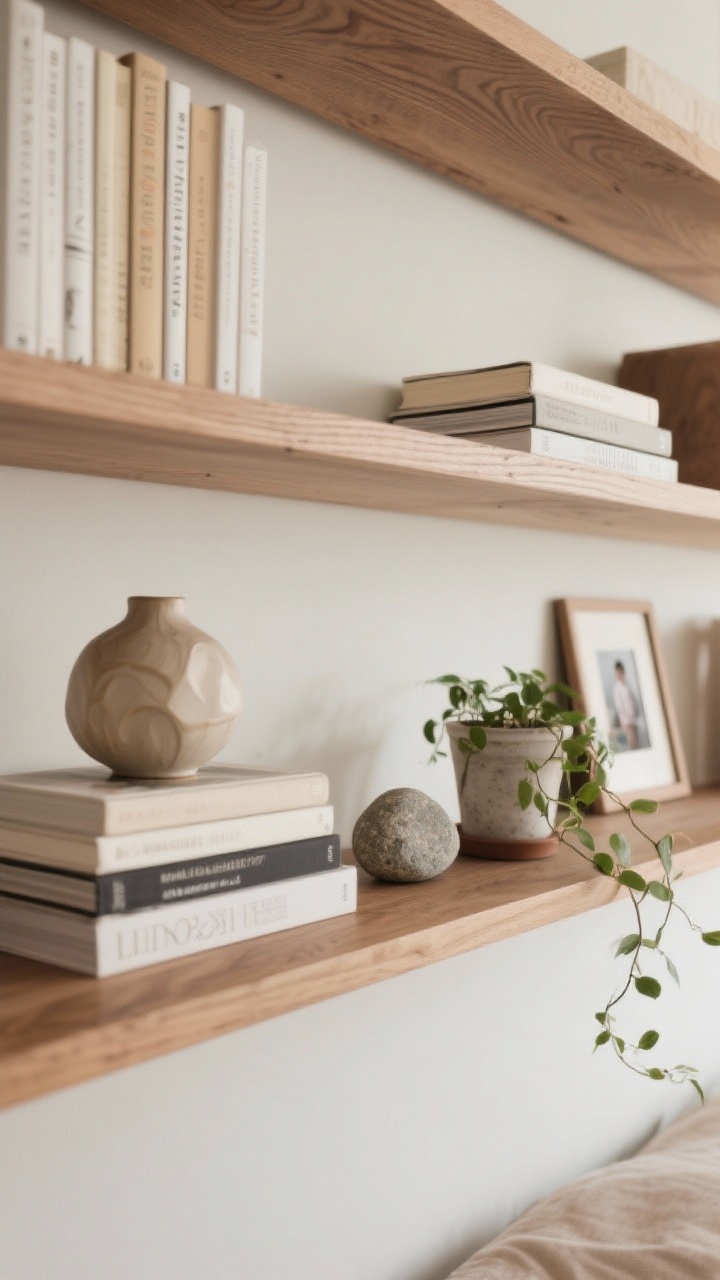
Shelves can scream chaos—or whisper “effortlessly chic.” The difference? Intention. Style your shelves like a mini gallery wall with layers and breathing room.
Styling Formula That Works Every Time
- Books (stacked horizontally and vertically)
- One sculptural object per shelf (vase, bowl, bust)
- Something organic (plant, branch, stone)
- Personal pieces (photo, travel memento)
Group items in odd numbers and vary heights. Leave negative space so the eye can rest. And rotate seasonally—no need to keep it static.
7. Frame It Like You Mean It

Art feels important when it’s framed well—full stop. Upgrade poster vibes to gallery-worthy with simple frames, mats, and consistent spacing.
Fast Ways to Elevate
- Use oversized mats to make small prints feel grand
- Stick with one frame color (black, white, or wood) for cohesion
- Swap glass for acrylic if weight is a concern
For a renter-friendly grid wall, use Command strips and a level. Pro move: Hang art at eye level—about 57 inches from floor to center.
8. Caulk, Patch, and Paint the Trim
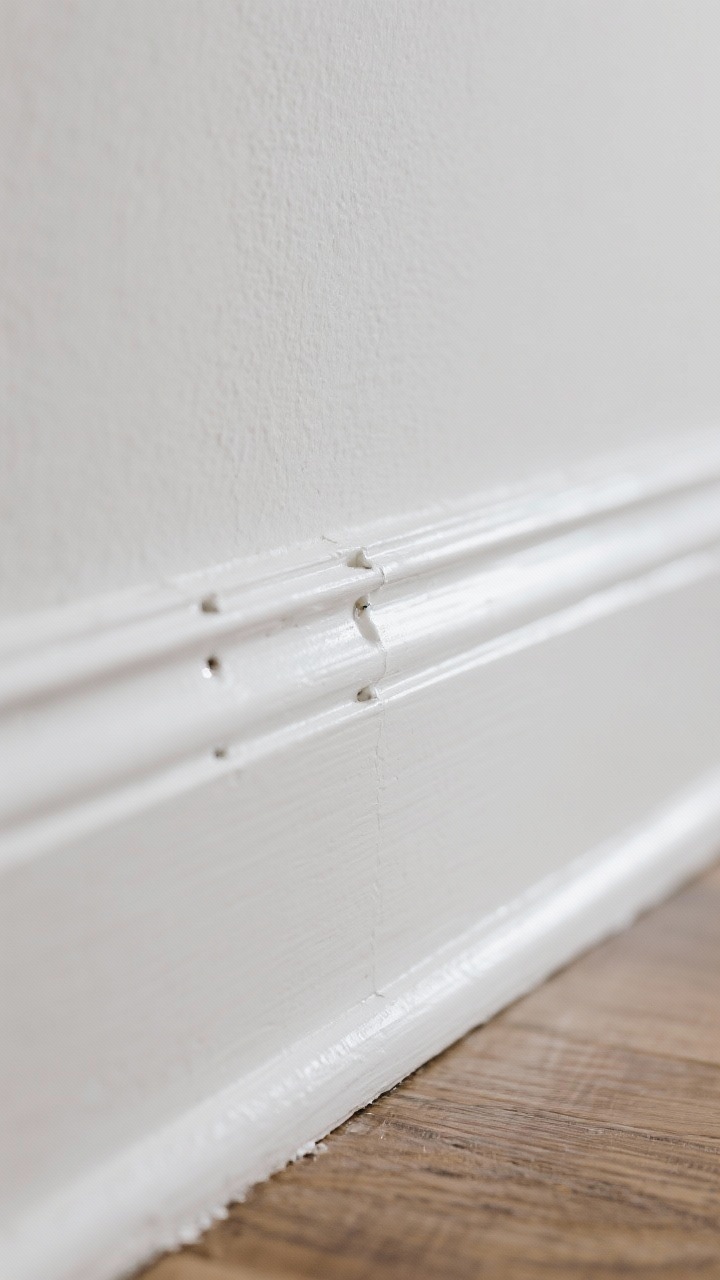
This is the glow-up nobody talks about. Clean, bright trim makes your entire home look fresher—even if you don’t touch the walls.
Weekend Refresh Checklist
- Fill nail holes with spackle, sand lightly
- Run a clean bead of caulk where trim meets wall
- Semi-gloss white paint for that crisp, durable finish
It’s a bit tedious, sure, but the payoff is huge. Your space will look newer without replacing a single thing.
9. Dress Your Windows Like a Stylist
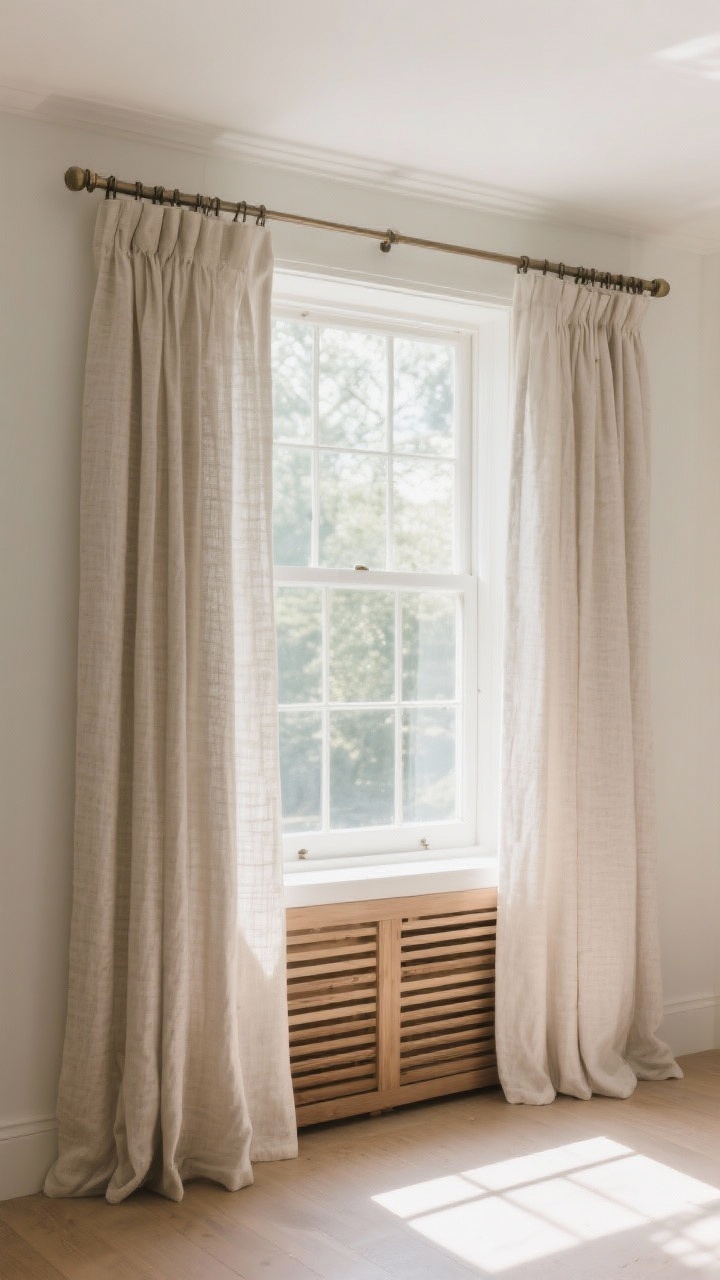
Skimpy curtains are like pants that are too short—technically fine, but… no. Hang curtains high and wide to make ceilings feel taller and windows bigger.
Rules That Never Fail
- Mount the rod 4–6 inches above the window (closer to ceiling = taller)
- Extend the rod 6–10 inches beyond each side (wider = bigger window)
- Panels should just kiss the floor or puddle slightly for drama
Choose textured linen or linen-look fabric for an elevated feel. If you’ve got blinds, layer with simple drapery—texture on texture adds richness, FYI.
10. Create a Signature Scent Strategy
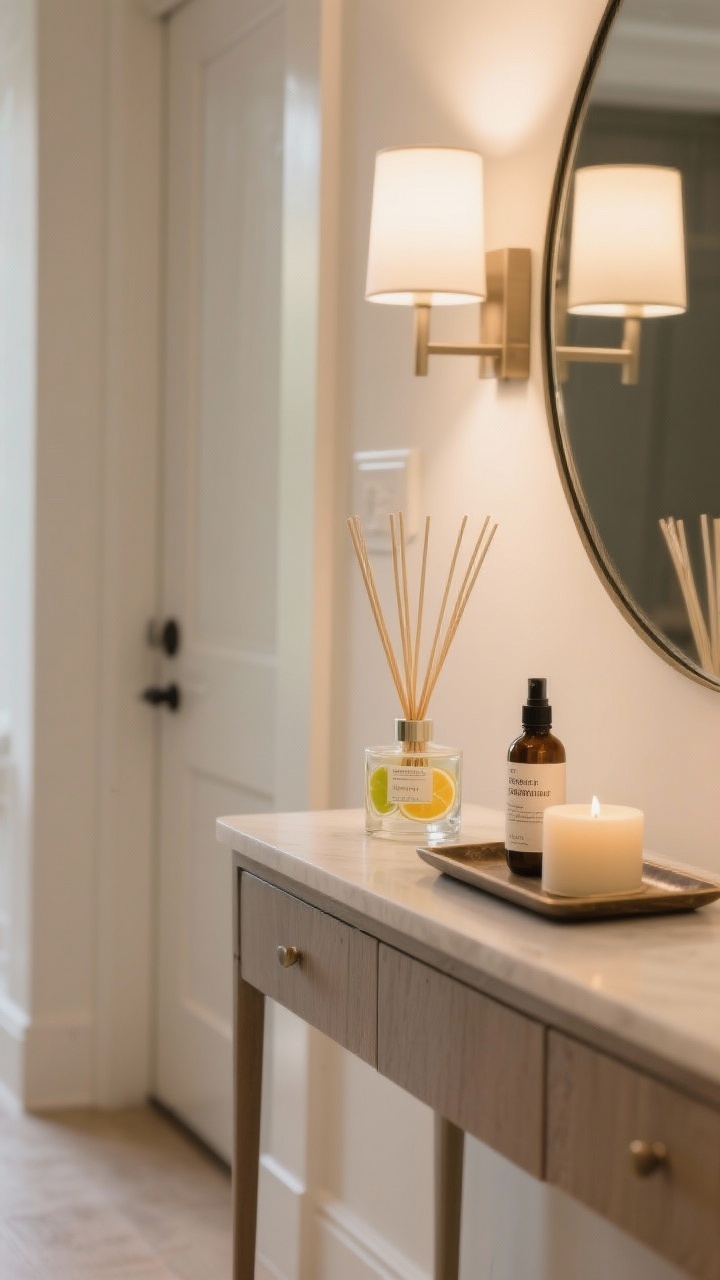
Design isn’t just visual—your home should smell like a mood. A subtle scent plan ties everything together and makes guests ask, “What is that?”
Set Your Scent Zones
- Entry: Fresh citrus or cotton for a clean welcome
- Living room: Warm sandalwood, amber, or fig to cozy things up
- Kitchen: Herbaceous notes like basil or rosemary that won’t fight dinner
- Bedroom: Soft lavender or cashmere blends for sleep vibes
Use a mix of candles, reed diffusers, and a simmer pot on special days. Keep it light and consistent—overpowering is not the flex you think it is.
Quick Bonus Tips to Maximize Impact
- Declutter surfaces before any upgrade—clean slate, bigger impact
- Repeat finishes (e.g., brass in three spots) to create cohesion
- Add one plant per room—instant life and texture
You don’t need a massive budget or contractor on speed dial to transform your home. Pick two or three of these small DIY changes with big impact, knock them out this weekend, and enjoy that “did I hire a designer?” feeling. You’ve got this, and your walls are already grateful.
Explore More & Elevate Your Home
If you’re dreaming of stylish rooms, warm textures and beautiful details that transform your space, explore our Home Décor.
For soft evenings, slow routines and a home that feels like a warm hug, discover more ideas in Cozy Living.
If you’re ready for less chaos and more calm, find realistic routines and tidy-home solutions inside Organization.
For soft-life habits and everyday routines that feel good, visit our Home Lifestyle.
When you’re in the mood for glow-up projects and creative home upgrades, explore DIY & Makeovers.
And if you want your balcony, terrace or garden to feel just as cozy as your indoors, get inspired in Outdoor Living.