You know that blank wall that’s silently judging you? Let’s fix that. These 9 easy DIY wall decor projects look high-end, won’t drain your wallet, and don’t require a fine arts degree. Grab some coffee, cue your favorite playlist, and let’s make your walls ridiculously chic.
1. Paint an Easy Geometric Mural
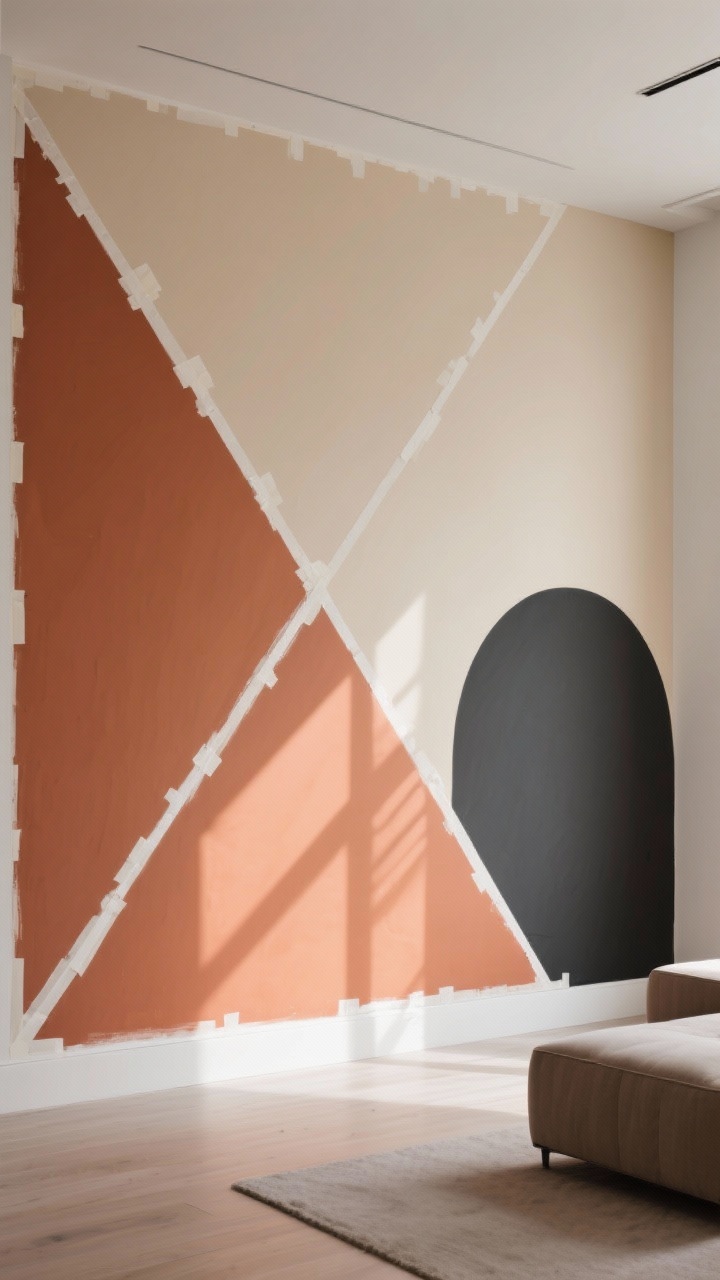
Zero art skills? Perfect. A geometric mural is basically paint-by-numbers for grownups. You’ll use painter’s tape to map out shapes, then fill them in with a few coordinating colors.
How to Do It
- Pick a palette: Choose 3–4 colors (one neutral, one accent, and a mid-tone). Think warm terracotta, creamy beige, and deep charcoal.
- Tape your shapes: Make triangles, diagonals, or arches. Overlap tape for crisp lines.
- Paint, dry, reveal: Paint inside the lines, let it dry, and peel for that satisfying “wow.”
Pro tip: Use a level or laser line for clean symmetry. Or go freeform for an artsy vibe—no one’s grading you.
2. Create a Gallery Wall That Feels Curated
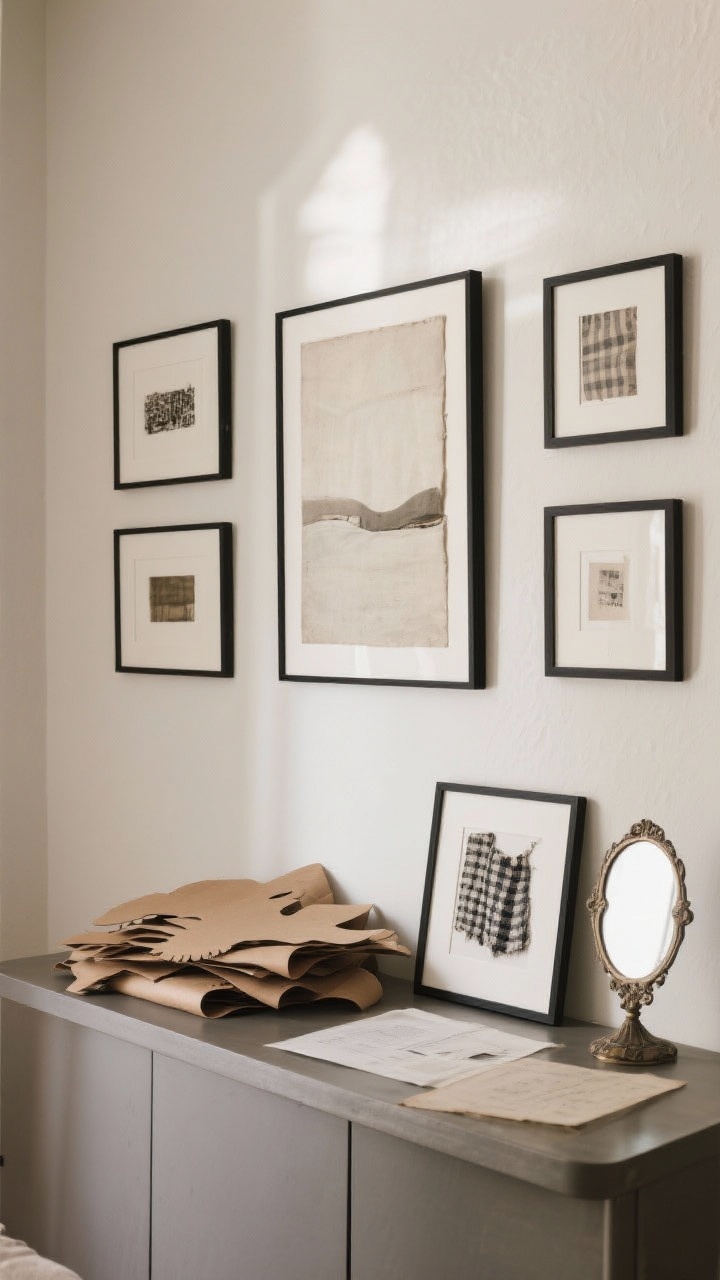
Gallery walls can go from chic to chaotic fast. The trick is mixing sizes and textures while keeping a common thread. Think matching frames or a shared color palette in the artwork.
Layout That Works Every Time
- Start with a hero piece: One large item anchors the arrangement.
- Add supporting players: Two mediums, three smalls, and something unexpected (like a textile or vintage mirror).
- Mock it on the floor: Arrange first, then hang. Use kraft paper cutouts to test on the wall.
Style idea: Mix art prints, family photos, a framed fabric scrap, and one sculptural object. FYI, black frames are the little black dress of gallery walls—always a good choice.
3. DIY Wood Slat Accent Panel
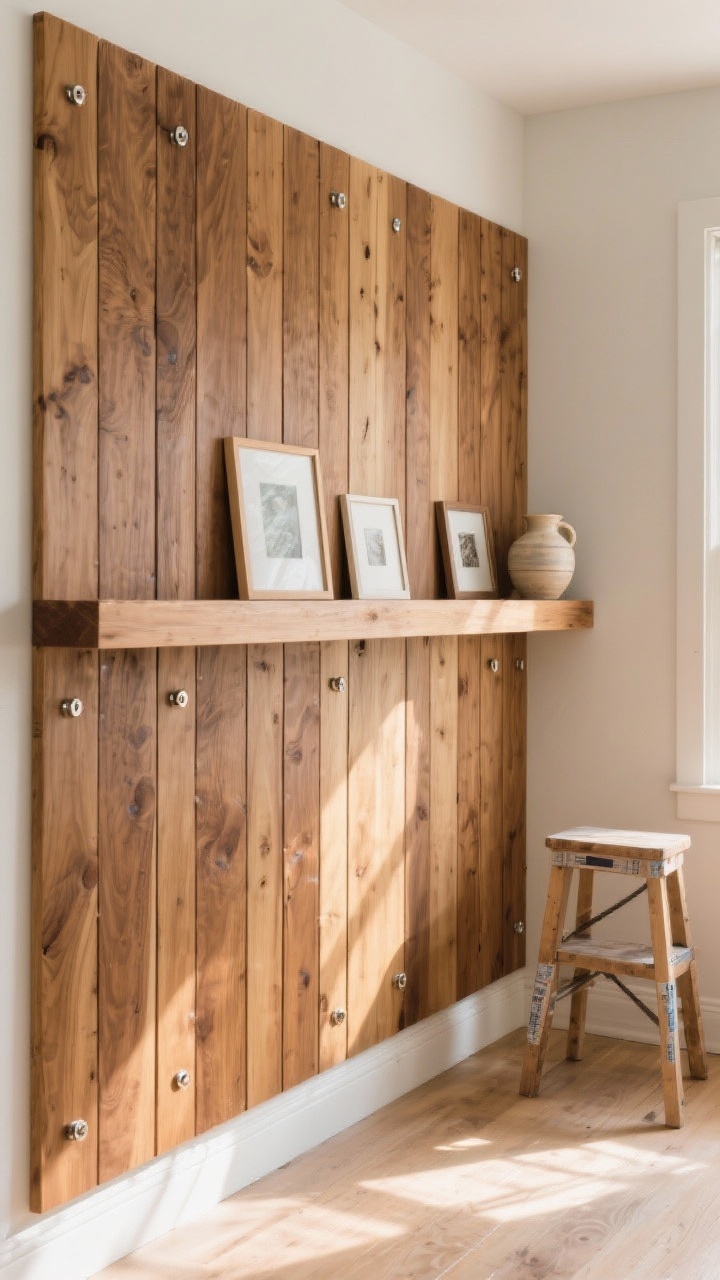
If your space needs texture, a wood slat panel delivers instant warmth and a custom look. It’s easier than it looks—promise.
Materials
- 1×2 or 1×3 wood strips (pre-sanded saves time)
- Stain or paint, construction adhesive, brad nails
- Spacers (nickels work in a pinch)
Steps
- Plan the width: Measure your wall and sketch the layout.
- Stain or paint first: It’s cleaner and faster.
- Attach: Apply adhesive, press slat, nail at the top and bottom. Use spacers between strips.
Design move: Run slats halfway up the wall and cap with a picture ledge for modern utility. Chef’s kiss.
4. Oversized Canvas Art (Without the Gallery Price)
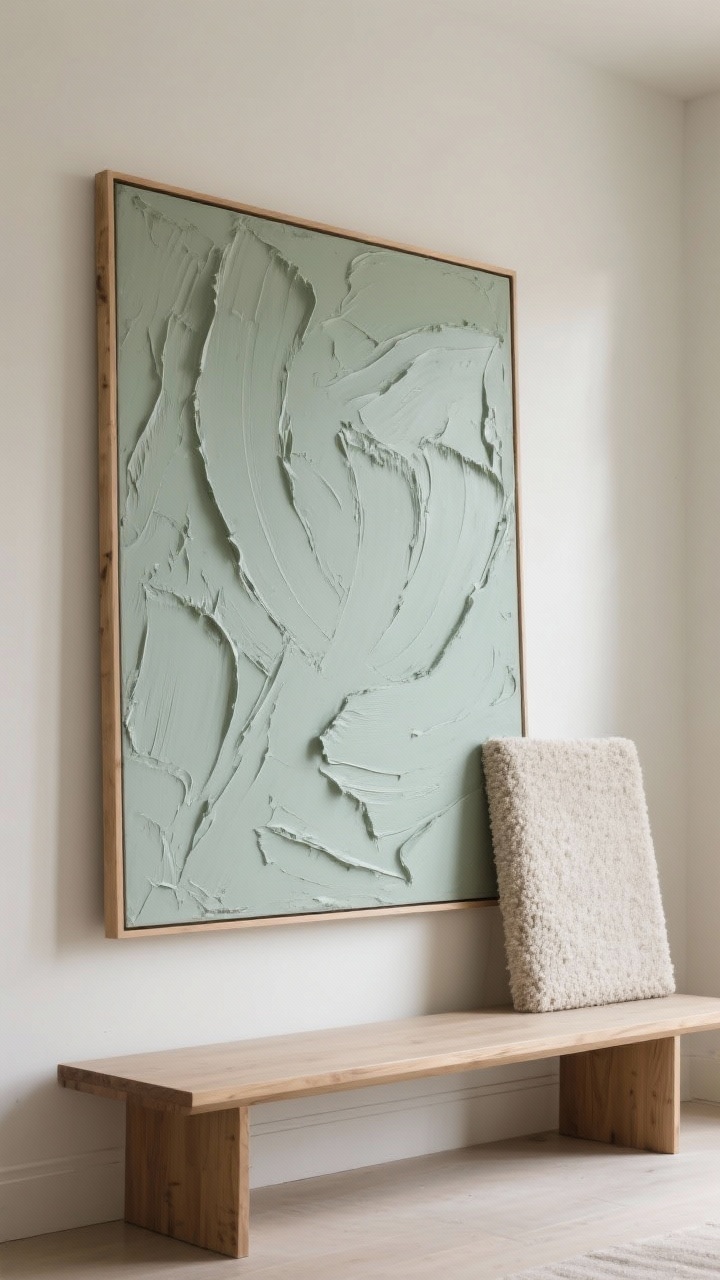
Big art makes a space feel intentional. But it doesn’t have to cost your rent. Make a giant piece with a canvas, leftover paint, and texture paste (aka drywall compound).
Make It Minimalist or Abstract
- Texture base: Spread joint compound with a trowel or spatula for sculptural texture.
- Monochrome magic: Paint it all one color for a luxe look—beige, charcoal, or sage.
- Frame trick: Build a thin pine frame (L-shaped) and stain it light oak for the “gallery” finish.
Shortcut: Wrap fabric over a canvas (bouclé or linen), staple, and frame. Fast, tactile, and chic.
5. Peel-and-Stick Wallpaper Accent (No Commitment)
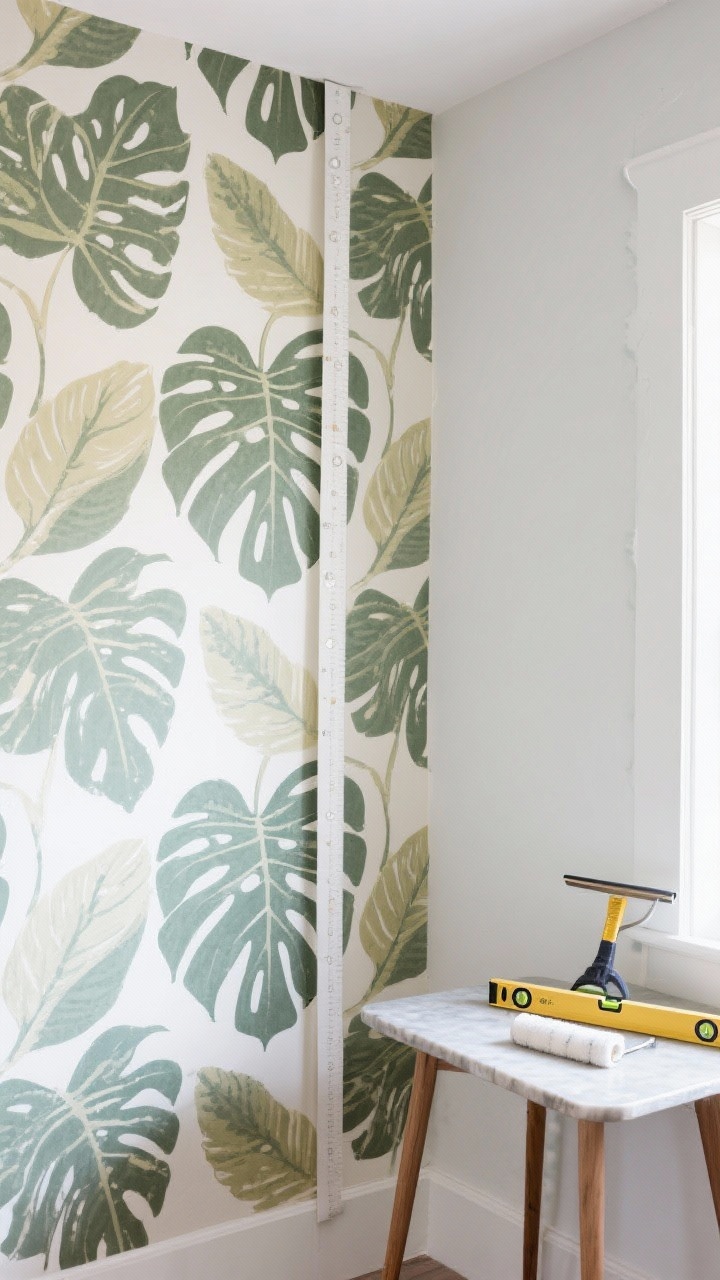
Wallpaper can be scary, but peel-and-stick is the friend who never causes drama. Try a single wall, a nook, or behind shelves to create depth and pattern.
How to Nail the Install
- Prep matters: Clean walls thoroughly. Dust ruins stickiness.
- Start plumb: Use a level for the first strip—everything follows that line.
- Smooth as you go: Use a squeegee or credit card to remove bubbles.
Design picks: Subtle stripes for height, botanical prints for softness, or geometric patterns for a modern edge. IMO, small spaces love big patterns—it feels bold, not busy.
6. Fabric Wall Hangings With Major Texture
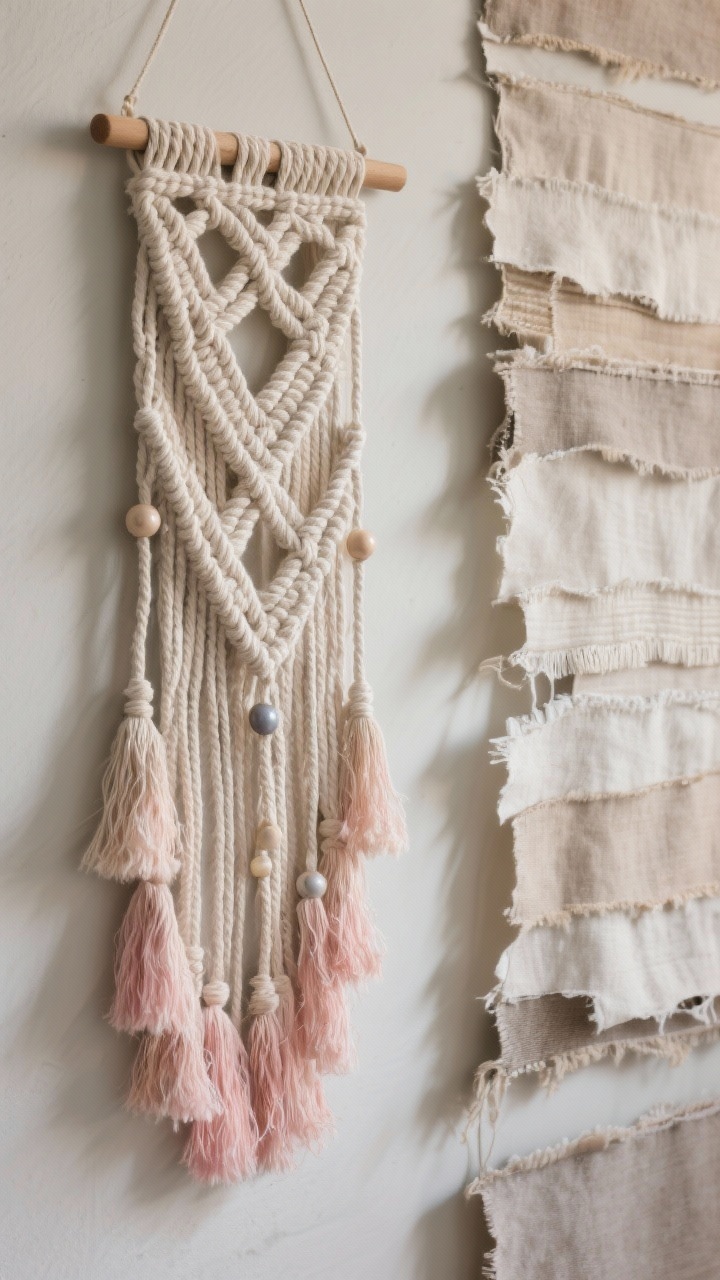
Fabric adds softness where walls feel flat. You can DIY a textile wall hanging using dowels, rope, and fabric scraps—no loom required.
Two Easy Options
- Fringed tapestry: Knot cotton rope onto a dowel, then comb out the ends for fluffy fringe. Add beads or dip-dye the tips.
- Layered fabric panel: Staple linen or canvas to a frame and layer torn strips in tonal shades for depth.
Mounting tip: Hang 6–8 inches above furniture. And keep it wide—oversized textiles feel luxe and intentional.
7. Picture Ledge Shelf Wall
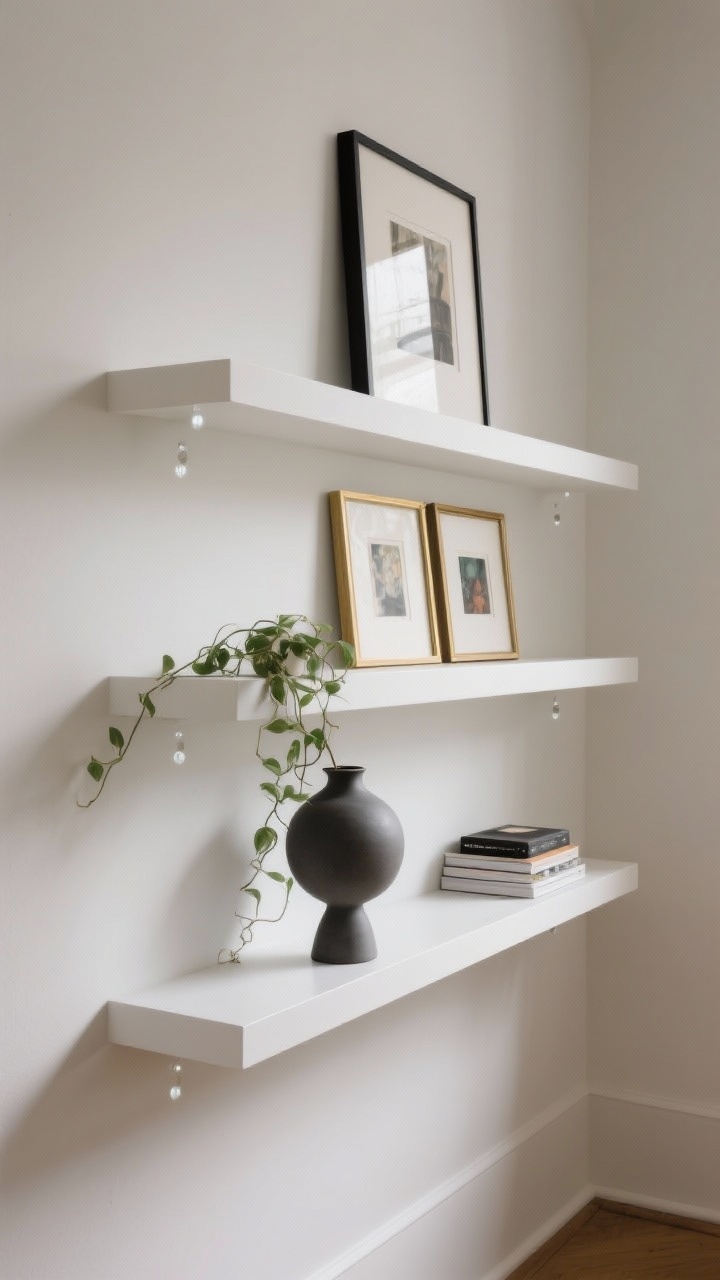
If you’re indecisive (same), picture ledges let you swap art without new holes. Stack two or three ledges and play with layers for a lived-in gallery vibe.
Build or Buy
- DIY: Use a 1×4 base, 1×2 front lip, and 1×3 back. Glue, nail, and paint.
- Store-bought: Great for renters. Mix lengths for asymmetry.
Styling That Works
- Layer frames—tall in back, small in front.
- Add a plant, a sculptural vase, or a stack of tiny books.
- Stick to 2–3 metals and a tight color palette for cohesion.
Pro tip: Use museum gel on frames to keep them from sliding. Gravity is not your friend.
8. Upcycle Frames Into Chic Shadow Boxes
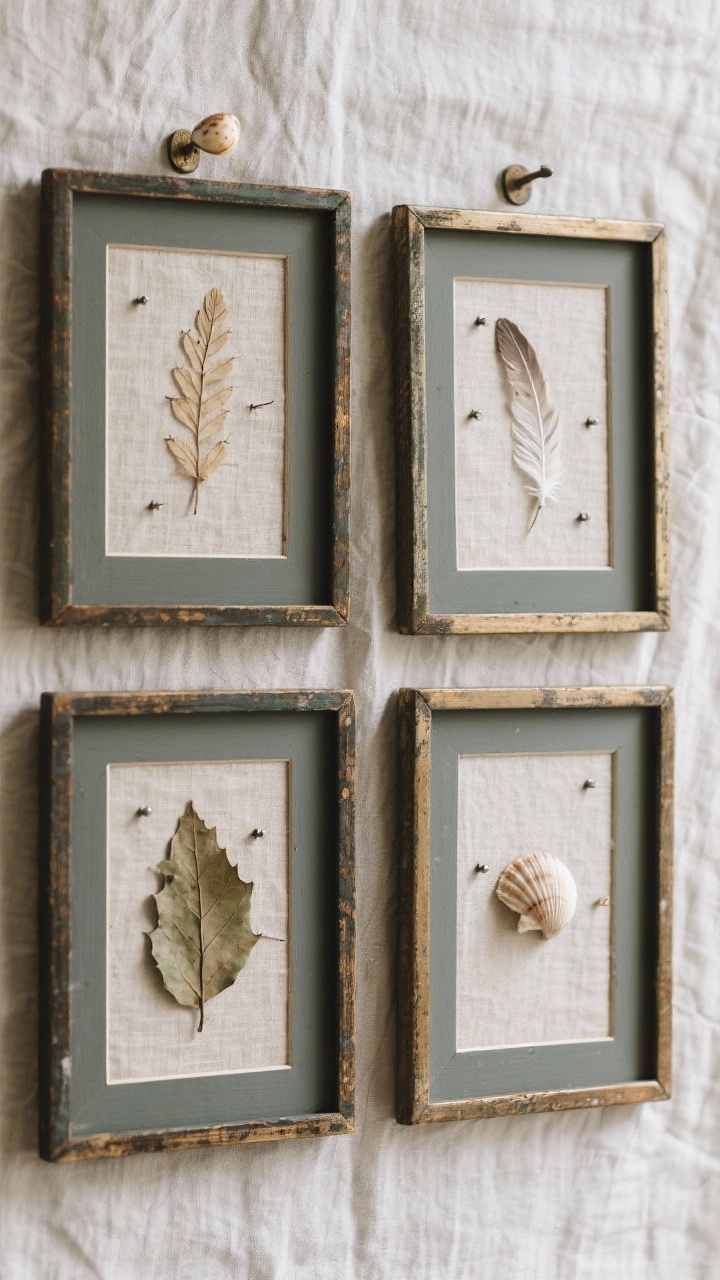
Shadow boxes elevate everyday objects into art. Think vintage keys, pressed leaves, ticket stubs, or textiles. It’s personal and wildly affordable.
How-To
- Find frames: Thrift stores are gold for deep frames. Or glue two frames together for extra depth.
- Back it: Use linen, burlap, or painted mat board for a museum look.
- Mount objects: Sewing pins for light items, museum putty for medium, tiny brackets for heavier pieces.
Design idea: A grid of four shadow boxes with natural specimens (shells, feathers, botanicals) brings instant “curated collectibles” energy, FYI.
9. Wall Sconces Without Hardwiring (The Magic Puck Light Trick)

No electrician? No problem. Get the puck light sconce look with battery-powered lights inside standard wall sconces. It’s the best renter hack on the internet, and yes—it actually looks legit.
What You Need
- Hardwired-style sconces (plug-ins work too)
- Battery puck lights with remote and dimmer
- Command hooks or anchors, depending on weight
Steps
- Mount the sconce base: Follow the hardware instructions or use sturdy wall anchors.
- Attach puck light: Stick it inside the shade with heavy-duty Velcro.
- Dim to cozy: Warm white light at 20–40% looks most like real bulbs.
Style tip: Flank artwork, mirrors, or a bed for hotel-level vibes. Add two for symmetry and instant polish.
Quick Tools & Supplies Checklist
- Painter’s tape, level, laser line
- Basic tool kit: drill, brad nailer (optional), stud finder
- Adhesives: construction adhesive, museum putty, Velcro
- Finishes: stain, paint, joint compound, caulk
Money-Saving Hacks
- Buy sample paint pots for murals—cheaper and plenty for shapes.
- Source frames and textiles at thrift shops; refresh with spray paint.
- Use plywood or MDF instead of solid wood where you can.
There you go—nine projects, zero intimidation. Start with one, step back, and admire the glow-up. Your walls are about to become the most interesting “people” in the room. Now go make something beautiful and brag-worthy.
Explore More & Elevate Your Home
If you’re dreaming of stylish rooms, warm textures and beautiful details that transform your space, explore our Home Décor.
For soft evenings, slow routines and a home that feels like a warm hug, discover more ideas in Cozy Living.
If you’re ready for less chaos and more calm, find realistic routines, systems and tidy-home solutions inside Cleaning & Organization.
For soft-life habits, everyday rituals and feminine home routines that feel good, visit our Home Lifestyle.
When you’re in the mood for glow-up projects, quick transformations and creative home upgrades, explore DIY & Makeovers.
And if you want your balcony, terrace or garden to feel just as cozy as your indoors, get inspired in Garden & Outdoor Living.