Let’s be real: new furniture is pricey, and the cute stuff sells out in five minutes. Upcycling is your wallet-friendly, planet-loving shortcut to a home that looks curated, not cobbled together. Grab that thrift-store rescue or your aunt’s hand-me-down and let’s make it fabulous.
1. Paint It, But Smarter: Two-Tone Magic
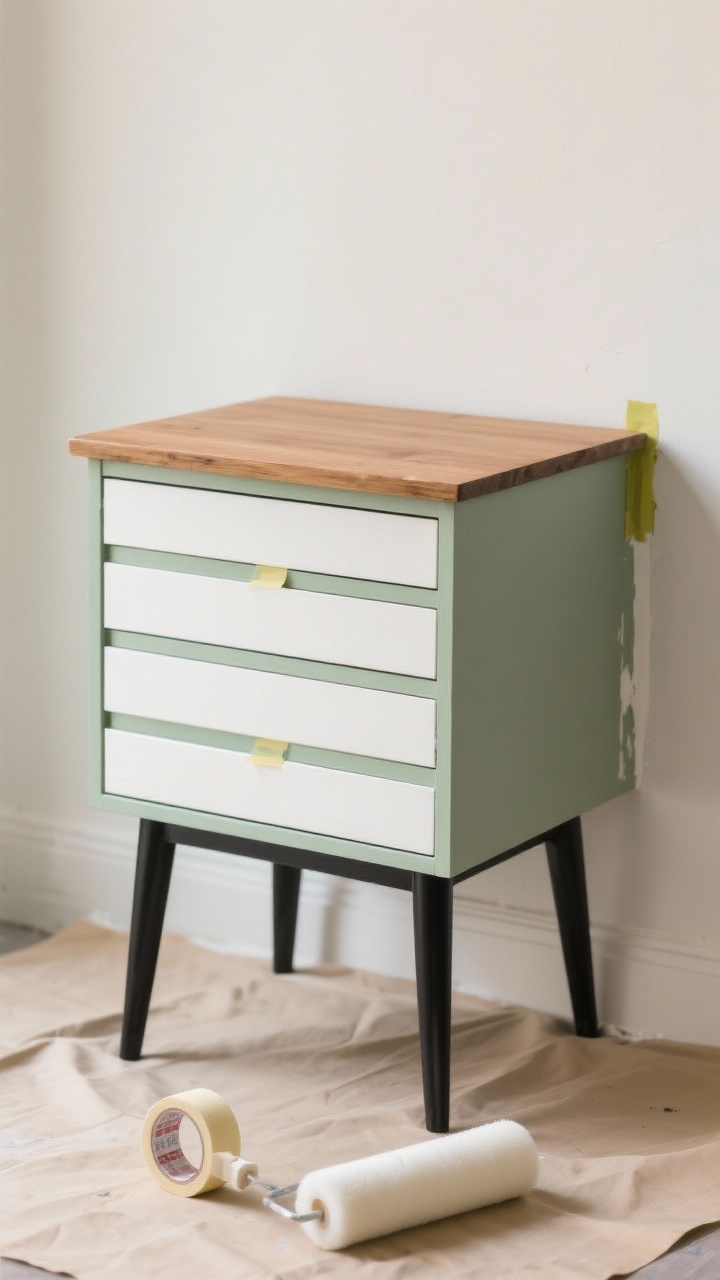
Yes, paint can fix almost anything—but a two-tone finish takes it from DIY to designer. Think matte black legs with a warm wood top, or a soft sage body with crisp white drawers. It’s modern, it’s forgiving, and it hides a multitude of sins.
Why It Works
- Contrast = style. Two tones add depth and structure.
- Budget-friendly. You need less paint when you split the palette.
- Beginner-proof. Tape lines cover uneven edges and chips.
Quick Steps
- Clean and lightly sand. Prime if it’s glossy or laminate.
- Paint the base color first. Let dry. Tape off your second section.
- Roll the second color with a foam roller for a smooth, pro finish.
Pro tip: Use paint + primer for quicker coverage. And FYI, satin sheen is the sweet spot—easy to clean, not too shiny.
2. Swap The Hardware: Instant Glow-Up
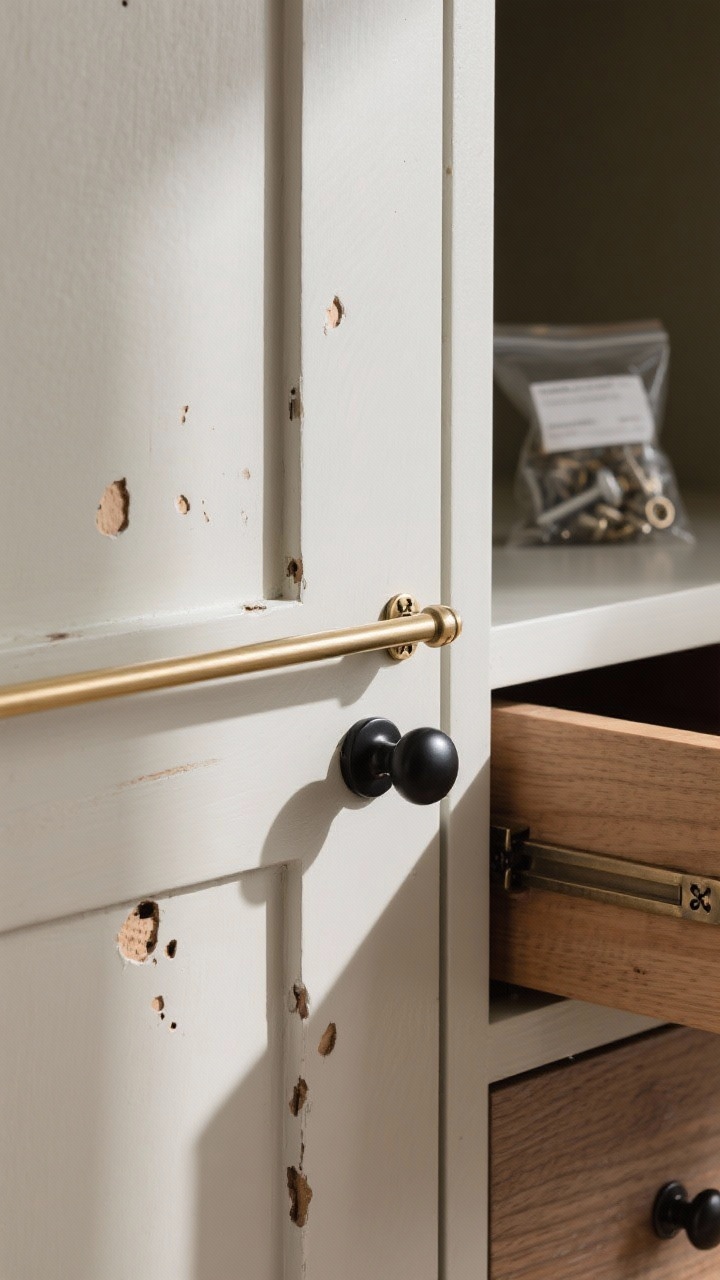
If you only do one thing, do hardware. New knobs and pulls can make a dated dresser look boutique-level fast. Mix finishes if you’re feeling bold—brushed brass with matte black is chef’s kiss.
What To Change
- Knobs and pulls: Change style and finish for instant impact.
- Legs/feet: Screw-on mid-century legs can modernize a plain cabinet.
- Hinges: Match to your new hardware for a cohesive look.
Shopping Tips
- Measure center-to-center distance on existing pulls so you don’t have to drill new holes.
- Buy one sample first. Hardware looks different in real light, IMO.
- For rentals, choose removable options and keep the originals in a labeled bag.
Pro tip: If new hardware holes are wider, fill the old ones with wood filler, sand smooth, spot-prime, and paint.
3. Add Cane, Rattan, Or Mesh For Breezy Texture
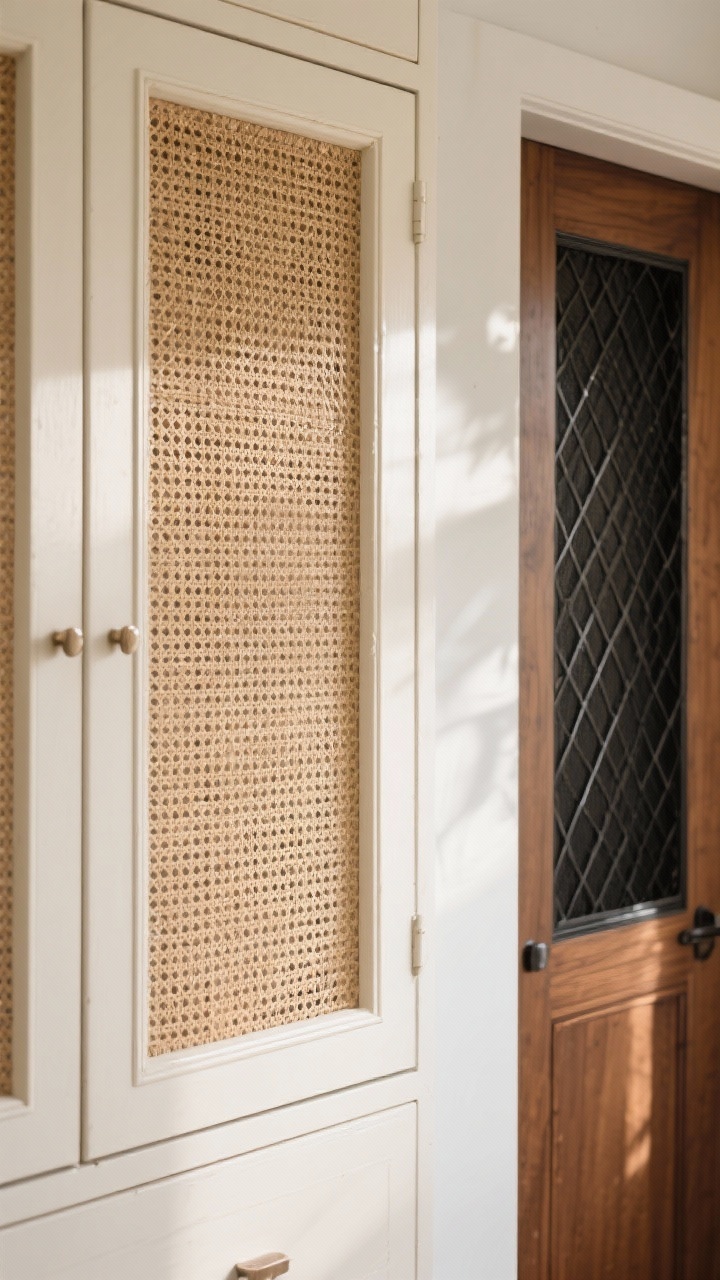
Want airy, trend-forward vibes? Add cane webbing or metal mesh to cabinet doors or drawer fronts. It’s lightweight, forgiving, and gives that high-end organic look without splurging.
How To Do It
- Pop out or cut the panel from a door/drawer front using a jigsaw.
- Soak cane webbing in warm water for 20 minutes so it stretches.
- Staple from the center outward, keep it taut, then trim the excess.
- Add thin trim (screen molding) over the edges for a clean finish.
Design ideas: Paint the frame a creamy white with natural cane, or go tonal—walnut stain with black mesh for a moody, luxe vibe.
4. Stain-Stripping For That Raw, Scandinavian Look
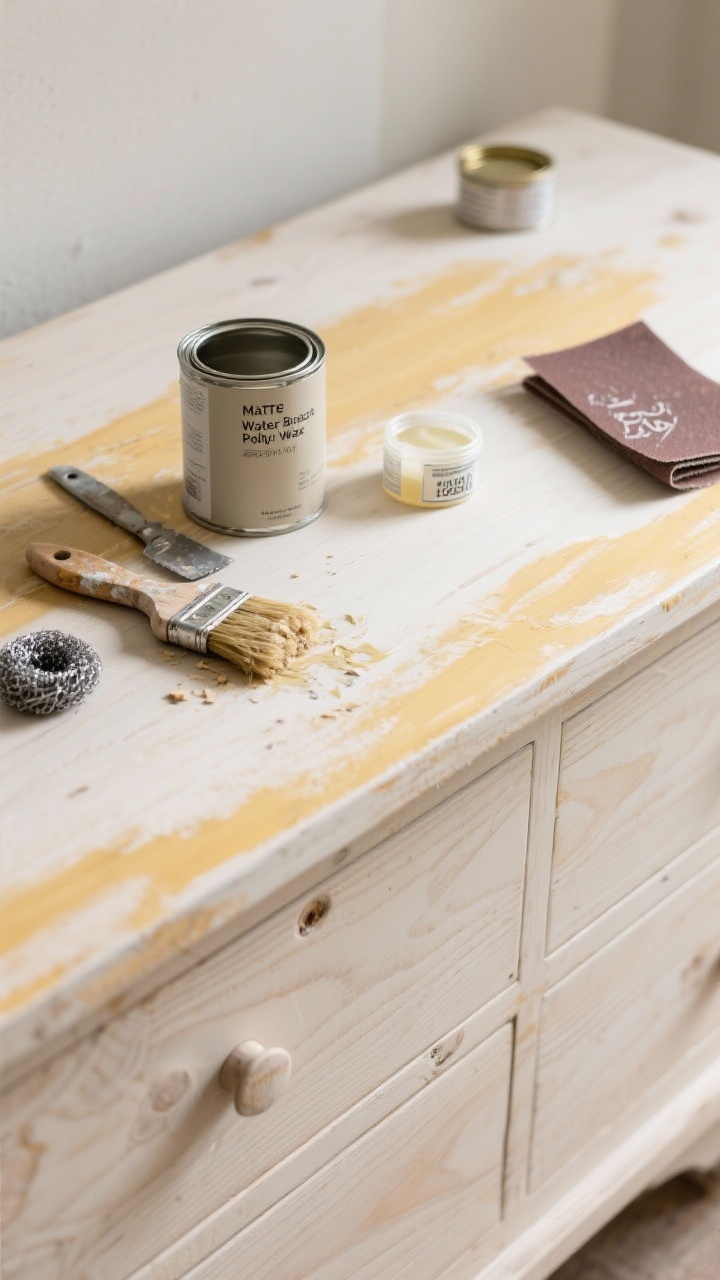
Sometimes the wood is gorgeous under all that orange varnish. Stripping the finish—and leaving it raw or lightly limed—feels earthy, airy, and expensive. Perfect for oak dressers, coffee tables, and nightstands.
Steps That Don’t Suck
- Apply a gel stripper with a chip brush. Wait, then scrape.
- Use steel wool dipped in mineral spirits to remove residue.
- Lightly sand with 180–220 grit for an even tone.
- Seal with matte water-based poly or wax to keep the raw look.
Finishing trick: If the wood reads yellow, wipe on a diluted whitewash before sealing to tone it cooler. Instant Scandi-chic.
5. Upholster The Easy Way: Drop-In Seats & Fabric Wraps
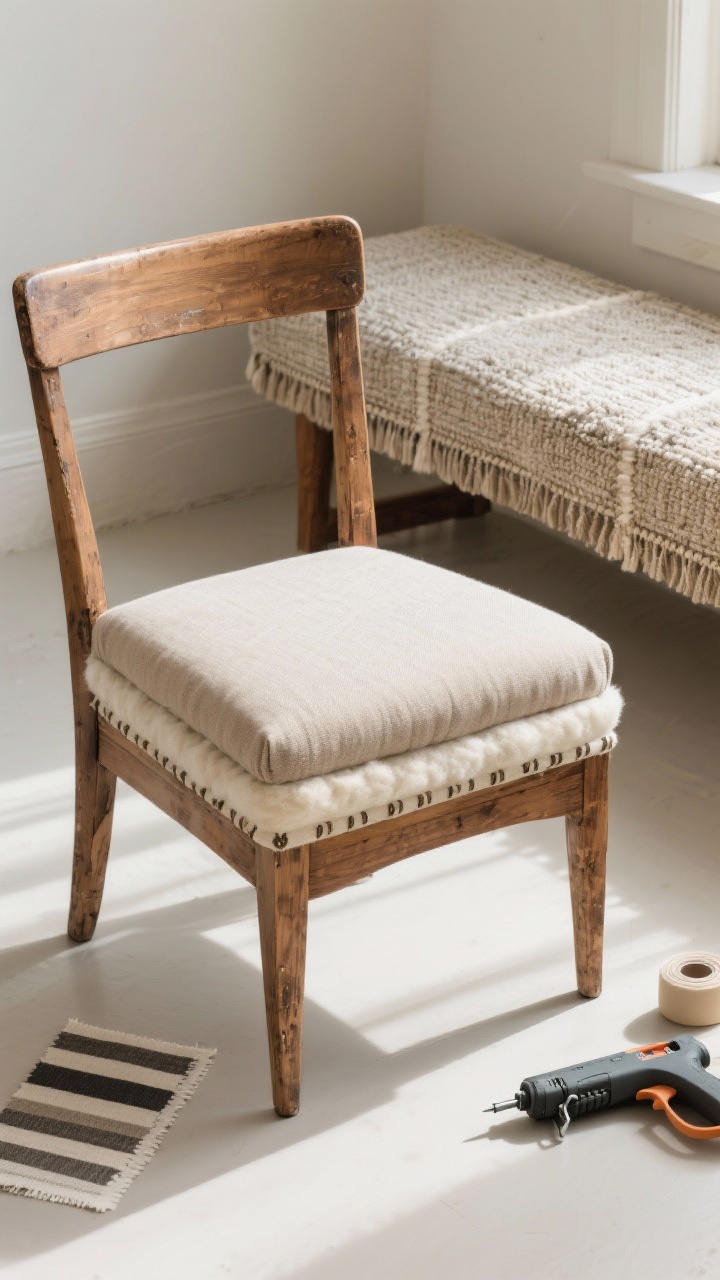
Upholstery sounds scary, but drop-in seats and fabric wraps are totally beginner-friendly. You can turn a thrifted chair into a custom piece with one meter of fabric and a staple gun.
Drop-In Seat How-To
- Unscrew the seat base. Use it as a template to cut foam and batting.
- Layer wood + foam + batting + fabric. Pull fabric taut and staple underneath, starting at the centers.
- Reattach the seat. Done. Applause.
Fabric Wraps For Headboards/Benches
- Add 1-inch foam and batting. Wrap with fabric like a present.
- Staple on the back side. Hide edges with double-folded fabric or gimp trim.
Fabric picks: Performance linen, canvas, boucle, or outdoor fabric for easy cleaning. Pattern lovers: stripes make everything look tailored.
6. Decoupage With Peel-And-Stick Or Paper For Pattern Play
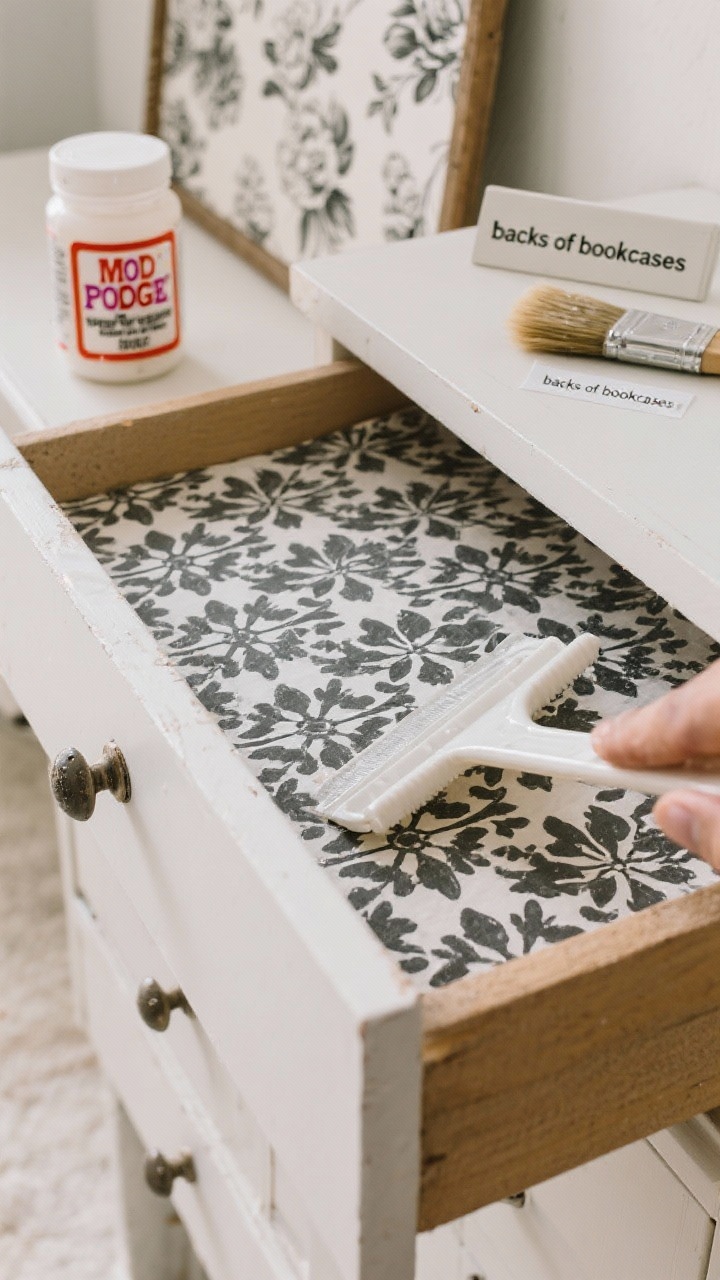
Pattern on furniture? Yes, please. Peel-and-stick wallpaper or decoupage paper can totally transform drawer fronts, cabinet interiors, and table aprons. Think quiet outside, surprise inside.
Where To Use It
- Drawer sides/interiors: A hidden pop of florals or stripes.
- Backs of bookcases: Adds depth without visual clutter.
- Tabletops under glass: Protects pattern and looks chic.
Application Tips
- Sand lightly and wipe clean for better adhesion.
- Apply from one edge, smoothing bubbles with a squeegee or credit card.
- Seal paper decoupage with two coats of matte Mod Podge or water-based poly. Peel-and-stick usually doesn’t need sealer.
Design note: Use pattern to complement, not compete. If your piece is bold, keep the base paint neutral. FYI, black-and-white prints always look crisp.
7. Turn A Dresser Into A Vanity Or Media Console
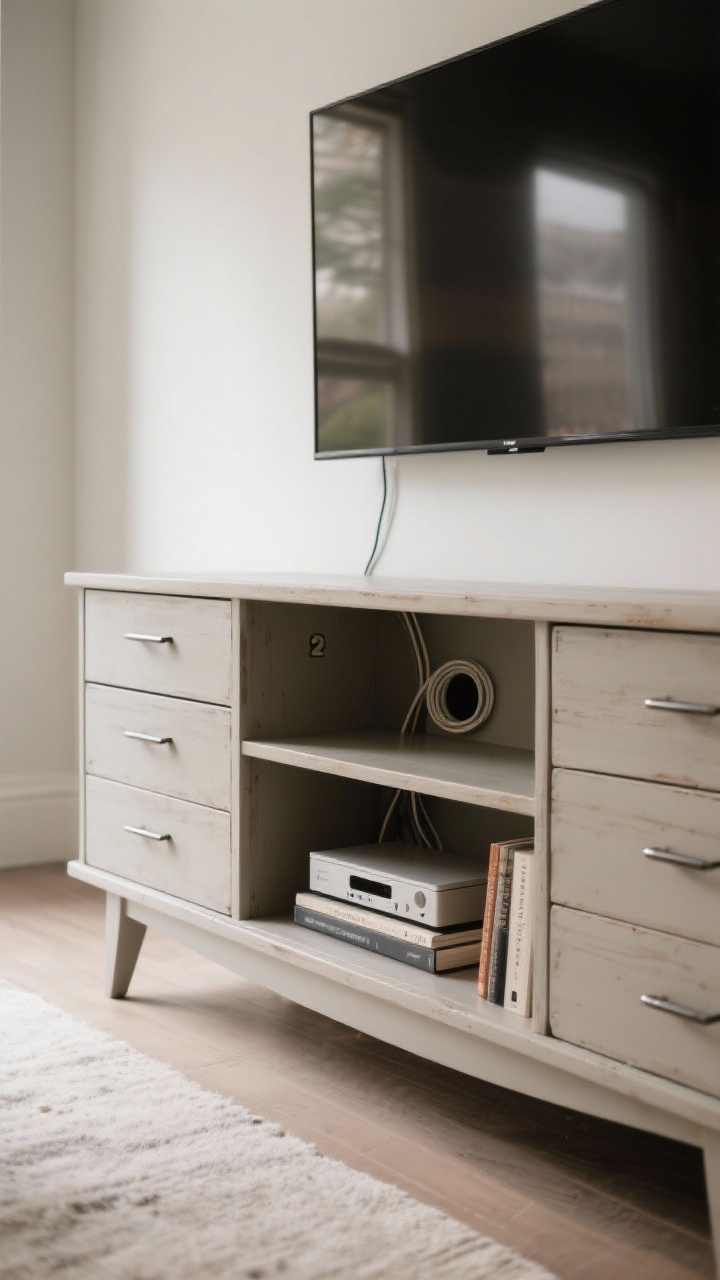
Big transformation energy. A beat-up dresser can become a bathroom vanity or a low-slung media console with simple tweaks. It’s functional, sustainable, and it looks custom.
Media Console Conversion
- Remove top drawers for open shelves; add a center support if needed.
- Drill a 2-inch hole at the back for cable management grommets.
- Paint or stain, then add modern pulls and short, angled legs.
Vanity Conversion (Beginner Version)
- Choose a sturdy dresser that fits your bathroom footprint and vessel sink size.
- Cut a hole in the top for plumbing. Remove or notch drawers to clear the trap.
- Seal the top with multiple coats of waterproof poly or add a stone/wood top.
Safety note: Anchor heavy pieces to the wall, especially if you remove drawers or add a sink. And if plumbing isn’t your thing, call in a pro for the hookup—worth it.
Tool Kit For Beginners
- Basic: Screwdriver set, sandpaper (120/180/220), painter’s tape, foam rollers, brushes.
- Nice-to-have: Staple gun, jigsaw, drill/driver, countersink bit, wood filler.
- Finishes: Primer, water-based paint, stain, matte poly, Mod Podge.
Where To Find Good “Befores”
- Facebook Marketplace and Craigslist (search “solid wood,” “dovetail,” “estate”).
- Thrift stores on weekdays—less competition.
- Curb alerts. Bring straps and a blanket. No shame in the game.
Final vibe check: Start small, learn as you go, and don’t chase perfection. Patina is personality, and small flaws read handmade—in the best way. You’ve got this. Now go turn that almost-trash into your new favorite thing.
Explore More & Elevate Your Home
If you’re dreaming of stylish rooms, warm textures and beautiful details that transform your space, explore our Home Décor.
For soft evenings, slow routines and a home that feels like a warm hug, discover more ideas in Cozy Living.
If you’re ready for less chaos and more calm, find realistic routines, systems and tidy-home solutions inside Cleaning & Organization.
For soft-life habits, everyday rituals and feminine home routines that feel good, visit our Home Lifestyle.
When you’re in the mood for glow-up projects, quick transformations and creative home upgrades, explore DIY & Makeovers.
And if you want your balcony, terrace or garden to feel just as cozy as your indoors, get inspired in Garden & Outdoor Living.