You’ve got great bones in those pieces—let’s give them a glow-up. Instead of splurging on new everything, we’re going to flip, paint, and style your old furniture into “wait, where did you buy that?” territory. Grab a drop cloth, your favorite playlist, and let’s transform your home one piece at a time.
1. Paint It Like You Mean It
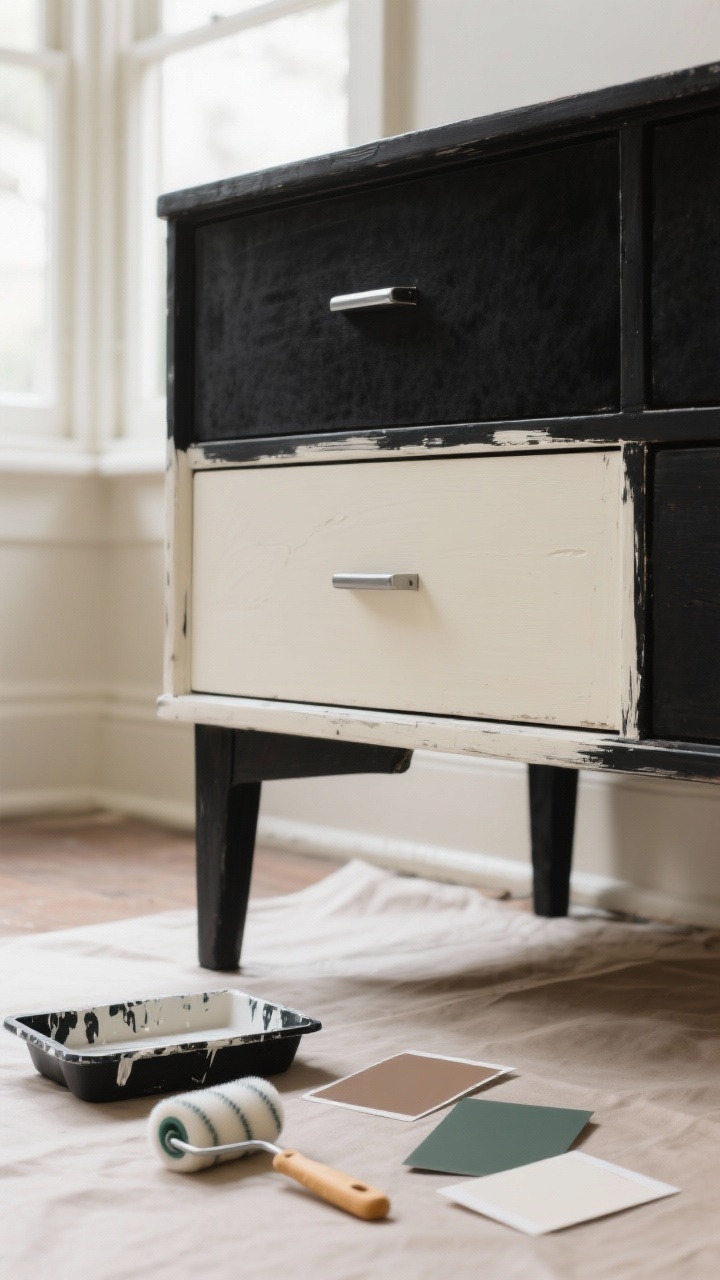
Paint is the fastest, cheapest way to change a piece’s mood. A tired dresser can go from “meh” to “designer” with a can of satin black and new hardware. Want a softer vibe? Try **earthy taupes, smoky greens, or creamy off-whites**—they’re instant upgrades.
Paint Tips That Actually Matter
- Prep well: Clean, sand lightly, and prime. Skipping this = peeling later.
- Choose a sheen: Satin for durability, matte for a modern, velvety look.
- Brush + roller combo: Brush for details, foam roller for smooth surfaces.
- Two thin coats: Thick paint looks gloppy. Thin coats look custom.
FYI: Two-tone is having a moment. Try a darker base and lighter drawers—or paint just the legs for a chic, subtle contrast.
2. Swap Hardware Like a Stylist
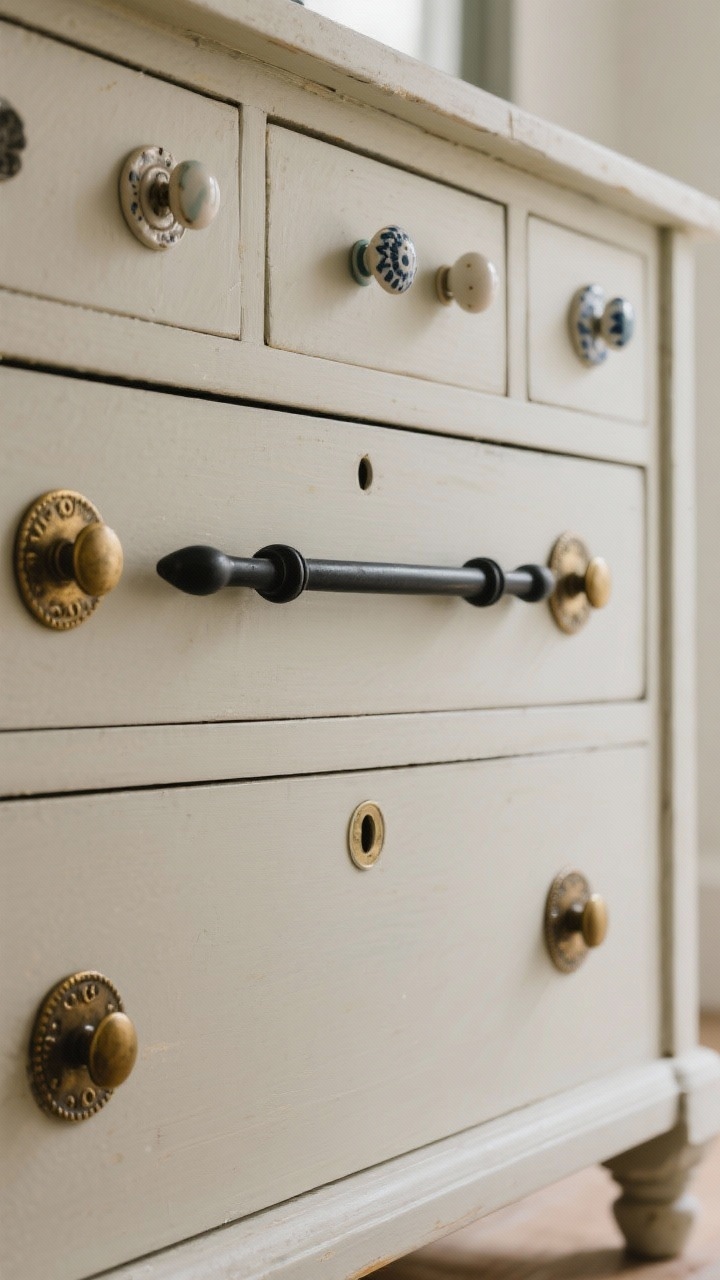
New pulls and knobs are like jewelry for your furniture. It’s a tiny change with seriously huge payoff. Think **aged brass for warmth, matte black for modern edge,** or **ceramic for cottage charm.**
How To Nail The Look
- Measure first: Check the distance between screw holes (center-to-center) to avoid drilling extras.
- Mix shapes: Use knobs on small drawers, handles on large ones.
- Go oversized: Longer bar pulls instantly elevate a basic dresser.
Pro move: Add a backplate behind knobs on vintage pieces to hide old scars and add a luxe detail.
3. Refinish Wood for That Heirloom Glow
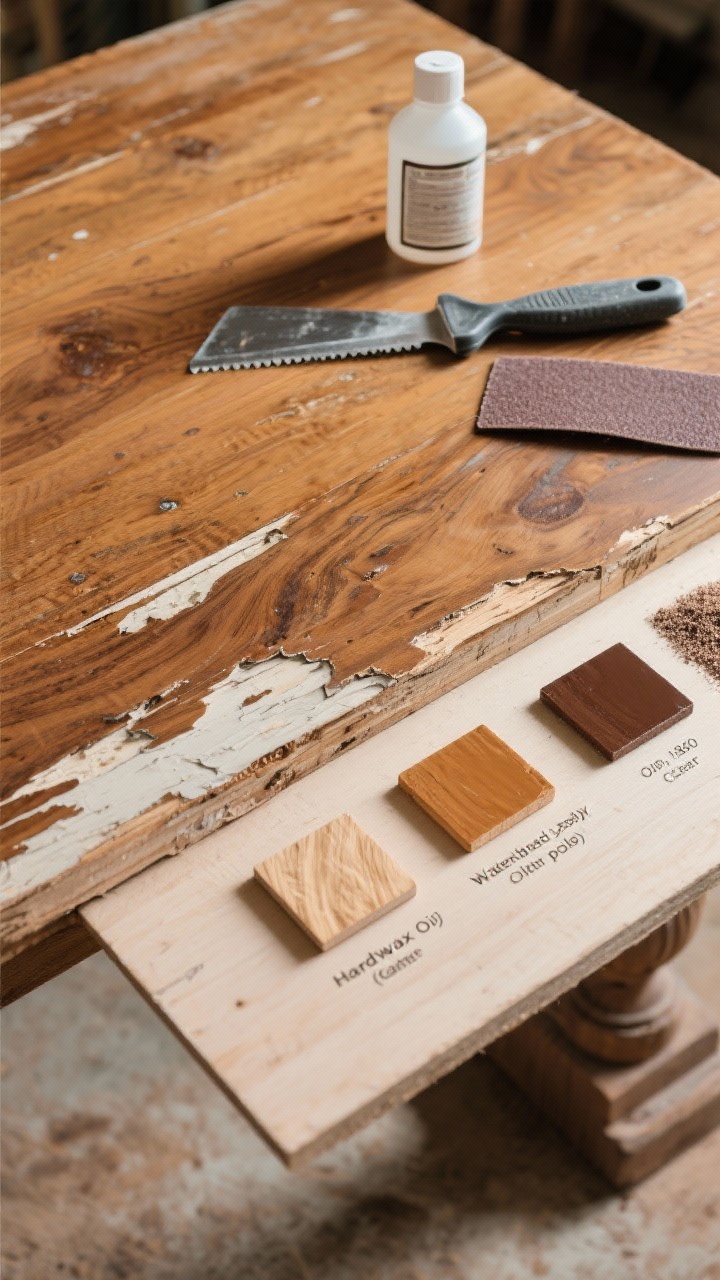
If your piece has real wood (not veneer), stripping and refinishing can reveal gorgeous grain. You’ll get that high-end, **restoration-store** vibe without the price tag.
Refinish Without Tears
- Use a chemical stripper or a gentle heat gun to remove old finish—avoid sanding first so you don’t dig into the veneer.
- Sand progressively: 120 → 180 → 220 grit for a buttery smooth surface.
- Stain wisely: Try light oak, walnut, or a natural oil finish. Test underneath first.
- Seal smart: Water-based poly for clarity, oil-based for warmth, or hardwax oil for a matte, hand-rubbed look.
Leave a touch of patina—tiny imperfections equal character, not flaws.
4. Reupholster the Easy Way
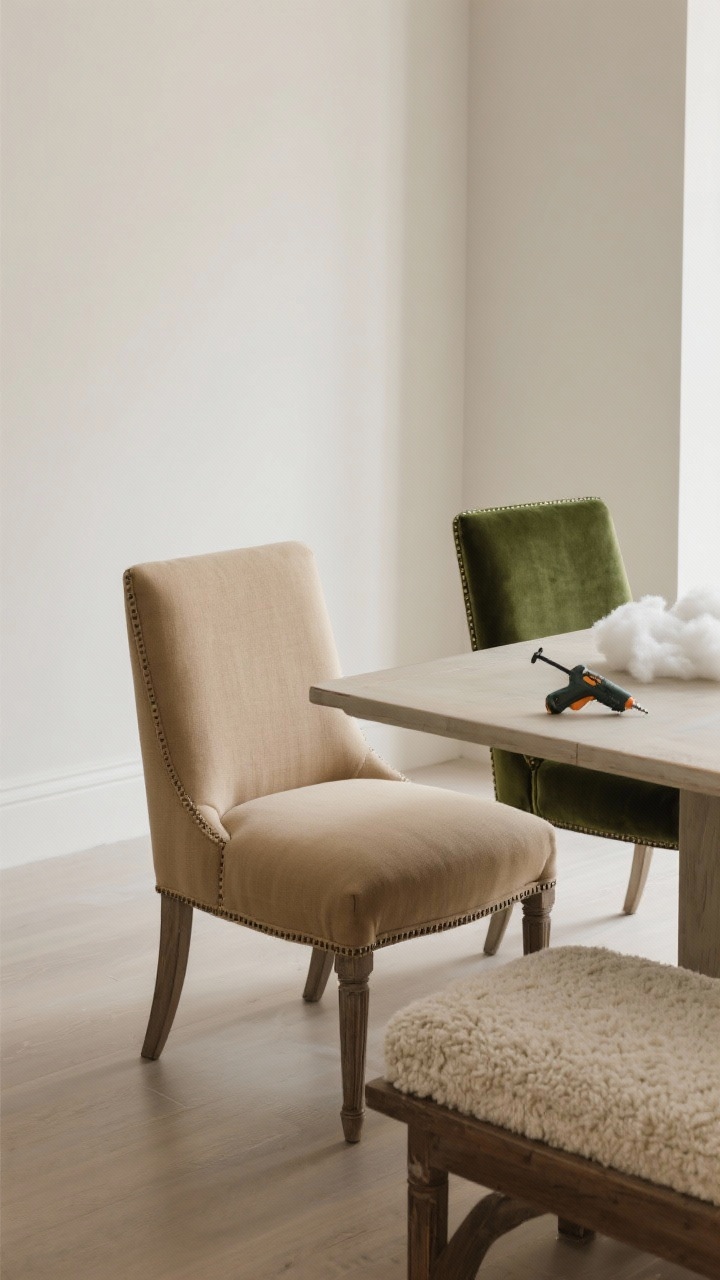
Chairs, benches, and headboards are begging for fresh fabric. You don’t need to be a pro—just a staple gun and some patience. Choose **performance fabrics** if you’ve got kids, pets, or both.
Fabric Choices That Win
- Linen-look polyester: Chic, durable, stain-resistant.
- Velvet: Adds instant glam; look for “performance velvet.”
- Textured bouclé: Cozy, on-trend, hides wear.
Tip: Replace foam if it’s saggy. A fresh, high-density cushion makes any chair feel brand new.
5. Add Cane, Rattan, or Reed for Organic Texture
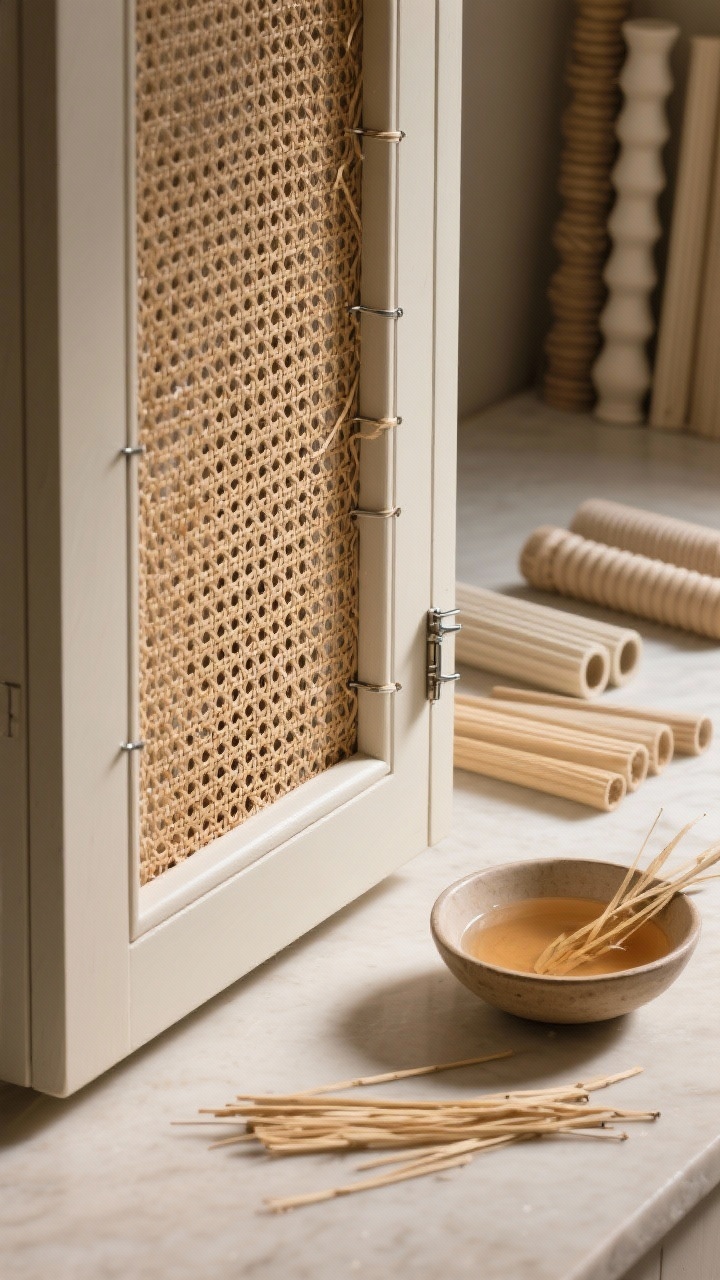
Want to make a basic cabinet look designer? Add **cane webbing** to the door fronts. It brings lightness, texture, and a hint of boho-chic without going full beach house (unless that’s your thing).
How To Cane a Door (The Simple Version)
- Cut out the door panel and leave a frame.
- Soak cane webbing in warm water for 30 minutes so it stretches.
- Staple on the back with a clean edge; trim once dry and taut.
- Optional: Add a thin molding to hide staples and finish the look.
Don’t want cane? Try **fluted dowels** on drawer fronts or **reeding** strips for that trending, textural look.
6. Create a Statement Top: Stone, Tile, or Wood Slab
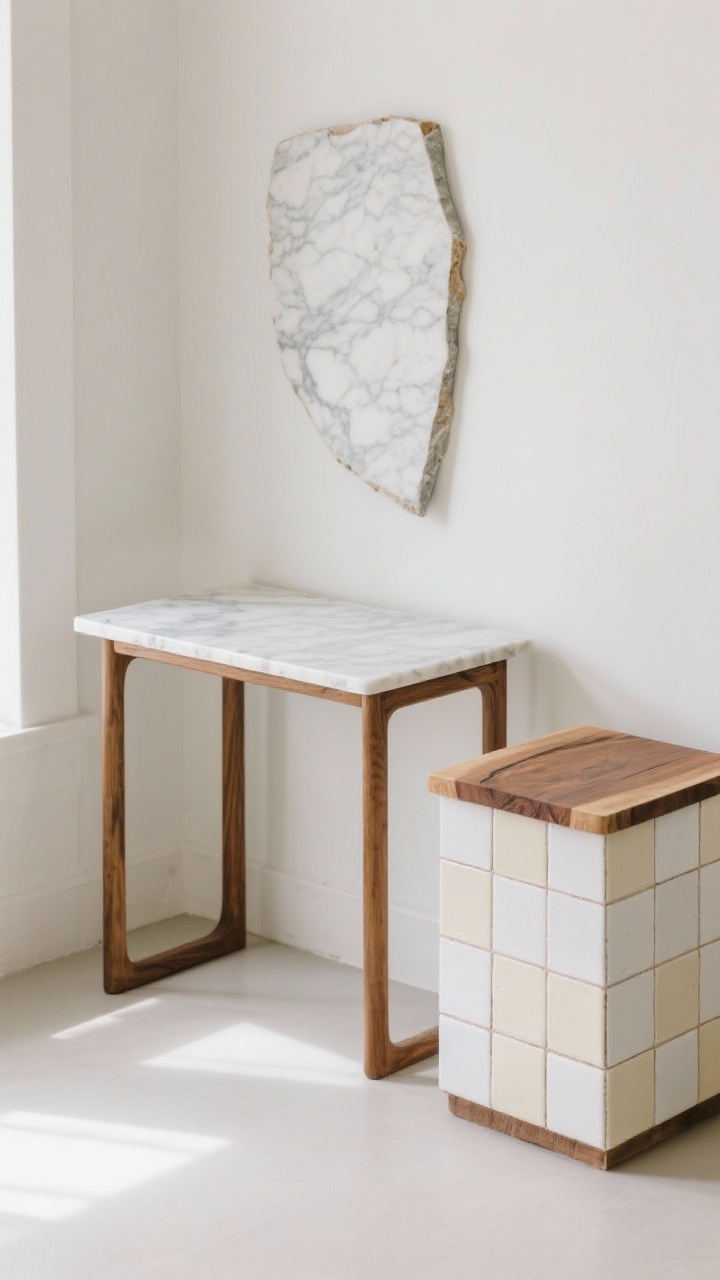
If the base is solid but the top is wrecked, give it a new crown. A **marble remnant, butcher block, or tiled top** can transform a flea market find into a focal point.
Topper Ideas That Deliver
- Tile a table: Use square zellige or checkerboard ceramic for Parisian-cafe vibes. Grout with a stain-resistant product.
- Stone remnant: Check local countertop shops for discounted cuts—often cheap and high impact.
- Butcher block: Warm, durable, and DIY-friendly. Finish with food-safe oil if it’s a kitchen piece.
Bonus: Protects the original furniture, so you get style and longevity in one upgrade.
7. Add Legs, Bases, and Casters for Better Proportions
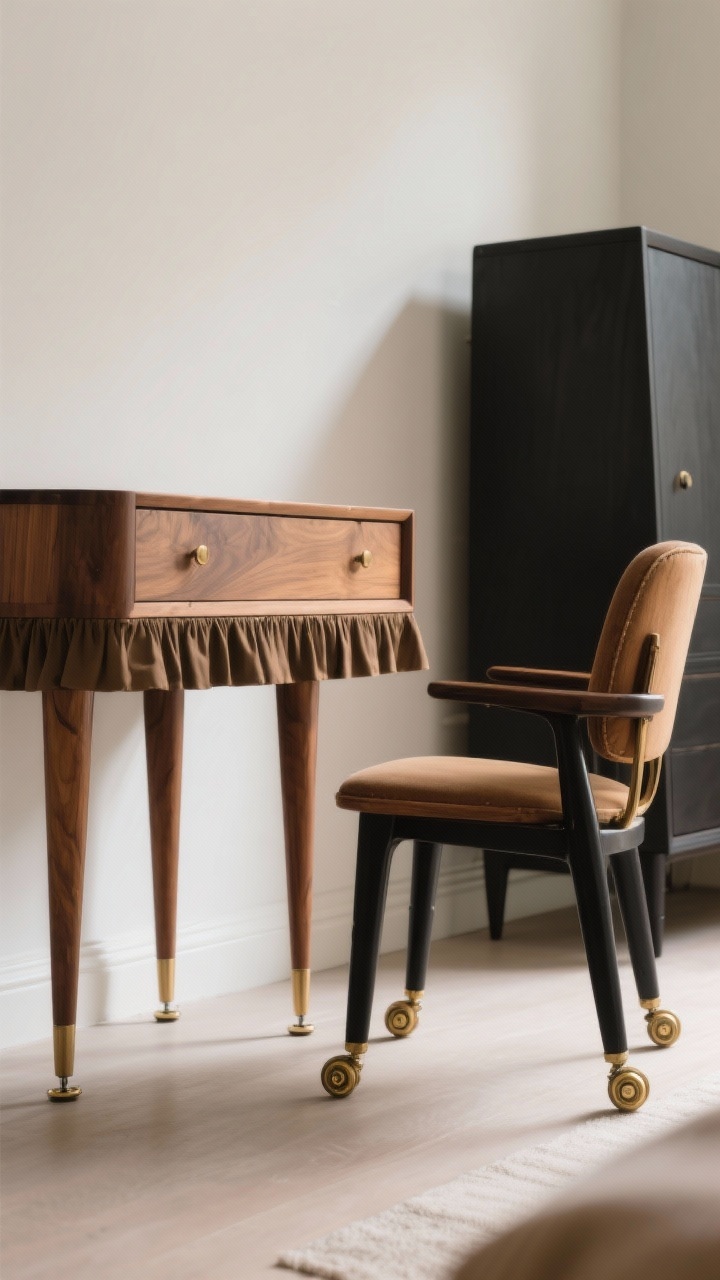
Elevation—literally—changes everything. Adding legs or a new base makes a bulky piece feel airy and modern. Plus, **brass casters** on a vintage chair? Instant charm.
Smart Structural Tweaks
- Swap the base: Replace a skirted base with tapered legs for mid-century appeal.
- Raise the height: Add leg extenders or taller feet to get the piece to standard counter/desk height.
- Use furniture levelers: Keep everything wobble-free on old floors.
IMO, tapered wood legs in walnut or black are the easiest way to modernize without overthinking it.
8. Embrace Pattern: Decoupage, Wallpaper, and Stencils
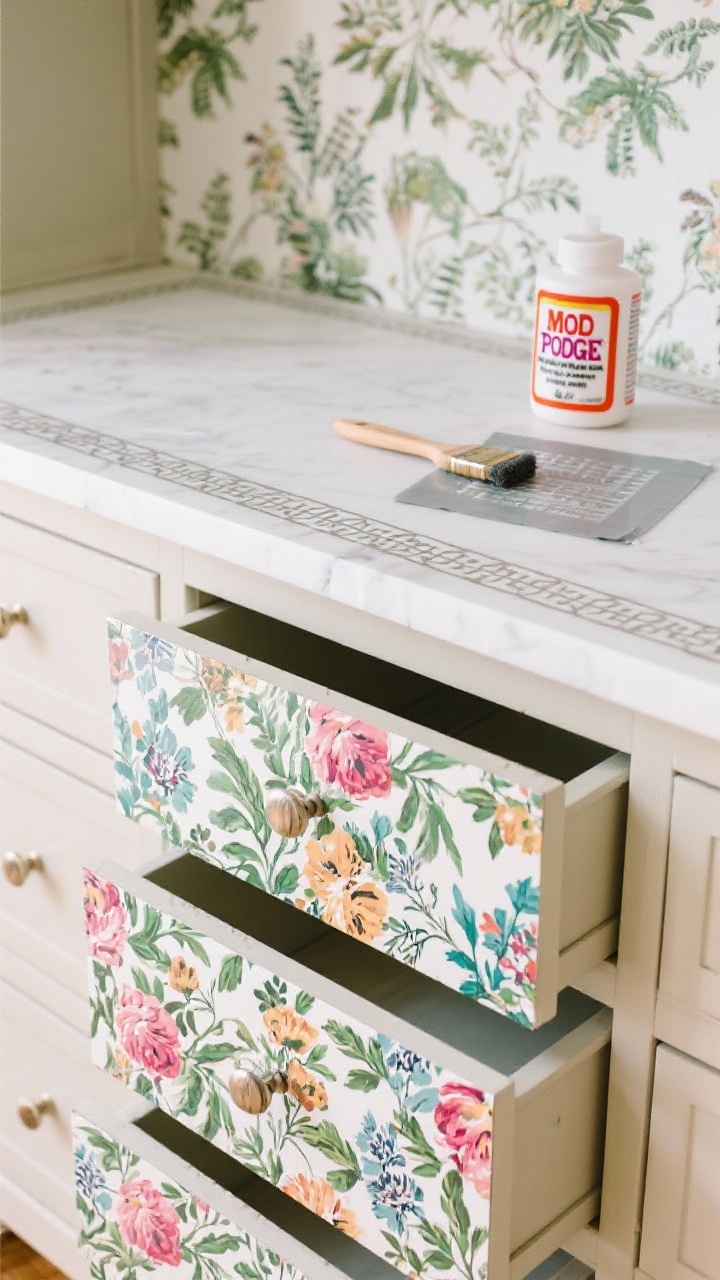
If you’re pattern-curious, this is your playful lane. The inside of drawers, the back of a bookcase, or the front of a nightstand can handle **bold florals, geometric prints, or botanical wallpaper.**
Pattern Play, Done Right
- Decoupage drawers: Use pretty paper and Mod Podge, then seal with clear poly.
- Wallpaper the back panel of cabinets or bookcases for dimension without commitment.
- Stencil a border on tabletops or sides for a boutique, hand-painted look.
Keep the rest of the piece simple so the pattern shines. Balance is key unless maximalism is your love language.
9. Convert It: New Function, New Life
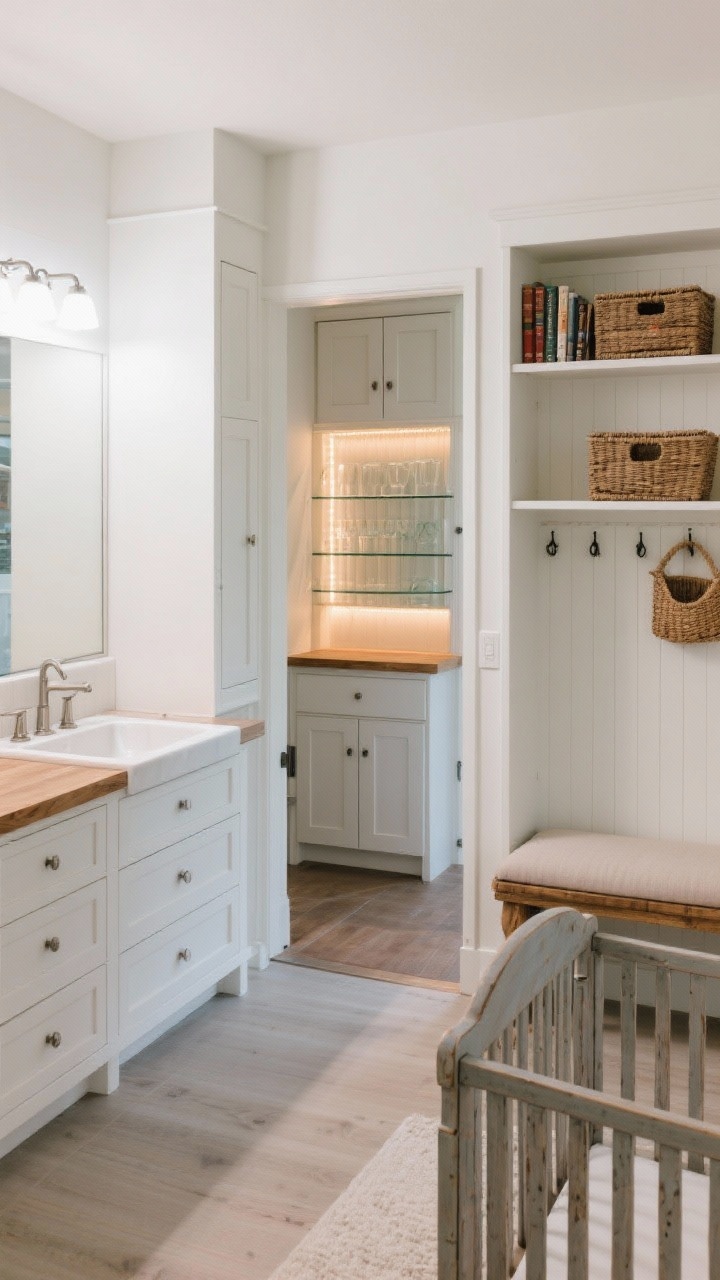
Sometimes the best upgrade is a whole new job description. Old furniture can be shockingly flexible if you think beyond its original purpose.
Upcycle Ideas That Make You Look Crafty
- Dresser → Vanity: Cut a hole for a sink, seal the top, and keep drawers for storage.
- Cabinet → Bar: Add glass racks, a mirror back, and LED strip lighting.
- Bookcase → Mudroom Locker: Add hooks, baskets, and a bench cushion.
- Crib → Bench: Use the side rails as a backrest—adorable and sentimental.
Think in zones: entryway catch-all, coffee station, home office storage. The right conversion solves a problem and looks custom.
10. Style It Like a Pro: The Finishing Touches

Even the best rehab looks flat without styling. Layering **lighting, art, linens, trays, and greenery** makes your furniture feel intentional and lived-in (not thrift-store chaotic).
Styling Rules That Never Fail
- Rule of three: Group items in threes with varying heights—lamp, stack of books, sculptural object.
- Texture mix: Combine wood, metal, ceramic, and fabric to add depth.
- Add a tray: Corral remotes, candles, and coasters on coffee tables and dressers.
- Soft goods matter: A crisp runner on a console or a throw over a bench adds warmth.
One plant per vignette is the secret sauce. A little life goes a long way, FYI.
Quick Starter Kit
- Quality primer and paint in your chosen sheen
- Sandpaper (120–220), wood filler, and a putty knife
- Staple gun, fabric, replacement foam/batting
- New hardware and a reliable drill
- Polyurethane or hardwax oil for sealing
Common Mistakes to Avoid
- Skipping prep: Clean, sand, and prime—non-negotiable.
- Over-sanding veneer: It’s thin; go gentle or you’ll hit the substrate.
- Ignoring scale: Tiny knobs on a massive dresser look off. Balance is everything.
- Color chaos: Keep a palette. Three main tones across your space is a good cap.
Ready to dig in? Pick one piece and one upgrade, and just start. The best part of refreshing old furniture is that it’s low risk, high reward—and you get a home that feels collected, not catalog. Your future self (and your wallet) will thank you.
Explore More & Elevate Your Home
If you’re dreaming of stylish rooms, warm textures and beautiful details that transform your space, explore our Home Décor.
For soft evenings, slow routines and a home that feels like a warm hug, discover more ideas in Cozy Living.
If you’re ready for less chaos and more calm, find realistic routines, systems and tidy-home solutions inside Cleaning & Organization.
For soft-life habits, everyday rituals and feminine home routines that feel good, visit our Home Lifestyle.
When you’re in the mood for glow-up projects, quick transformations and creative home upgrades, explore DIY & Makeovers.
And if you want your balcony, terrace or garden to feel just as cozy as your indoors, get inspired in Garden & Outdoor Living.